In this guide, you will learn how to create new machines on LubeWear.com. Follow the instructions below to successfully add new machines to the system.
Go to lab.lubewear.com
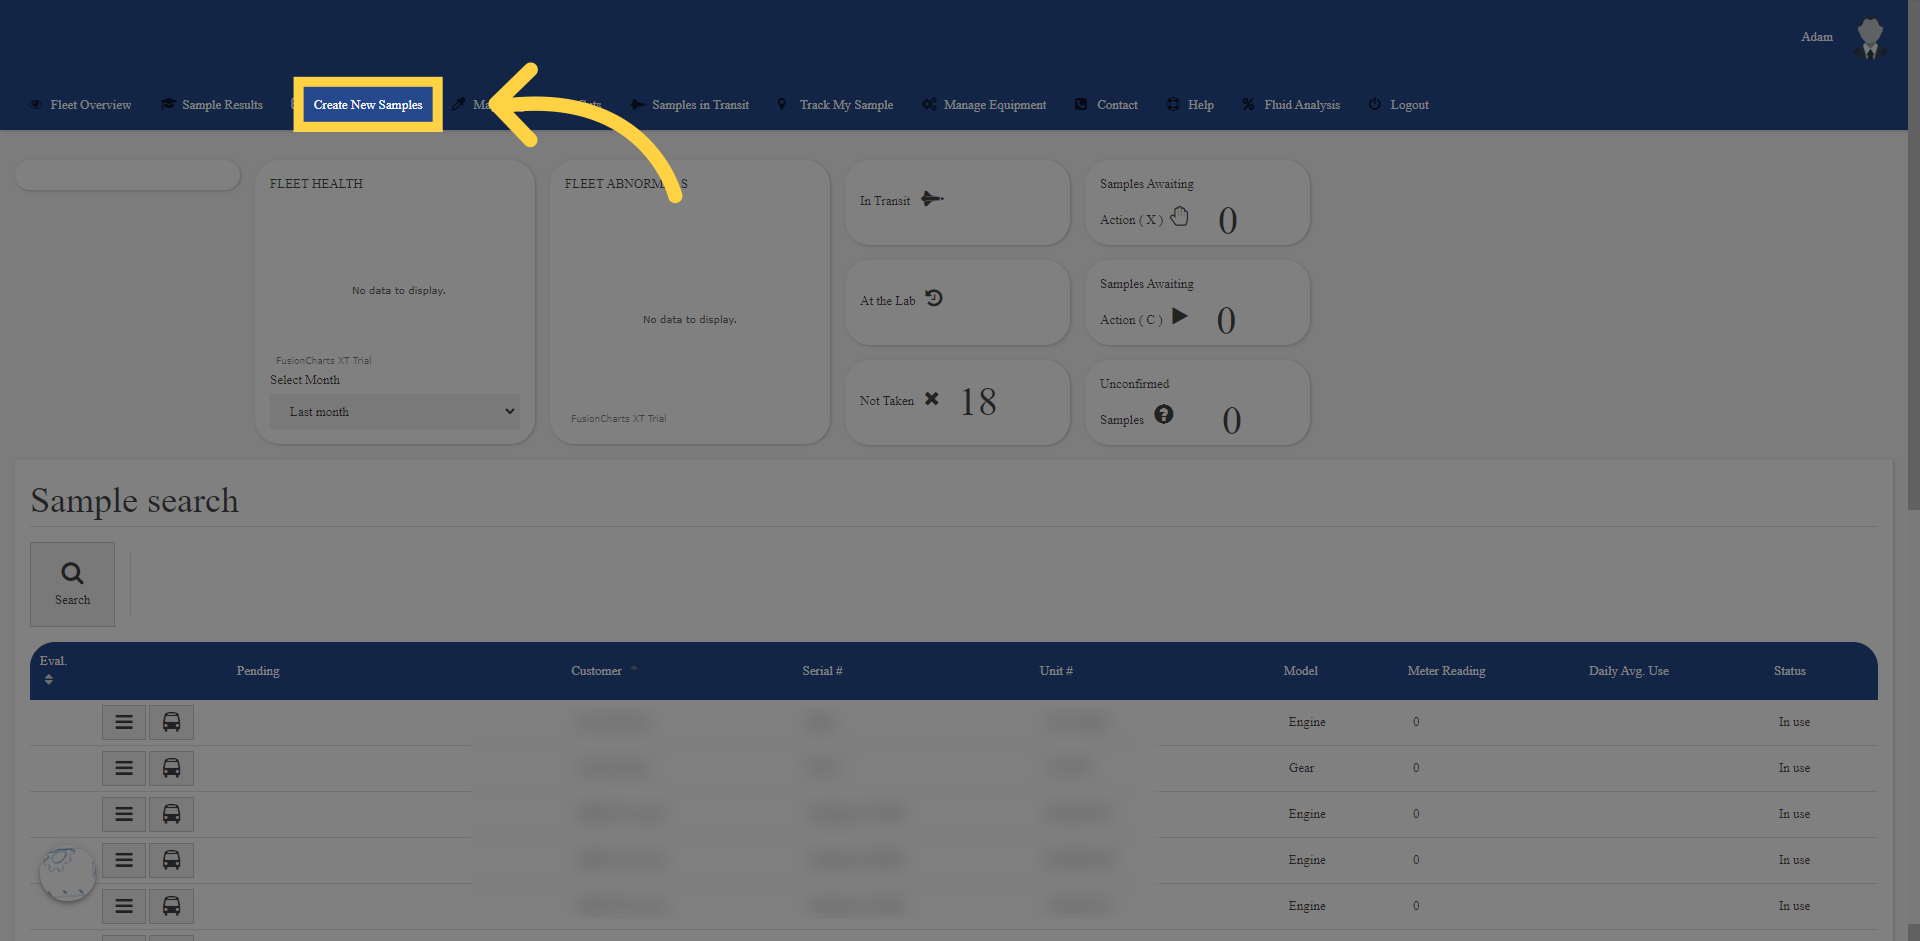
1. Click “Create New Samples”
Once logged into the portal, click create new samples, or if using the LubeWear Go app, you will already be on the create New samples page when you login.
2. Pick customer
Pick the first drop down option. You will likely only have one option here, but if you manage multiple customers, you can pick the relevant option.
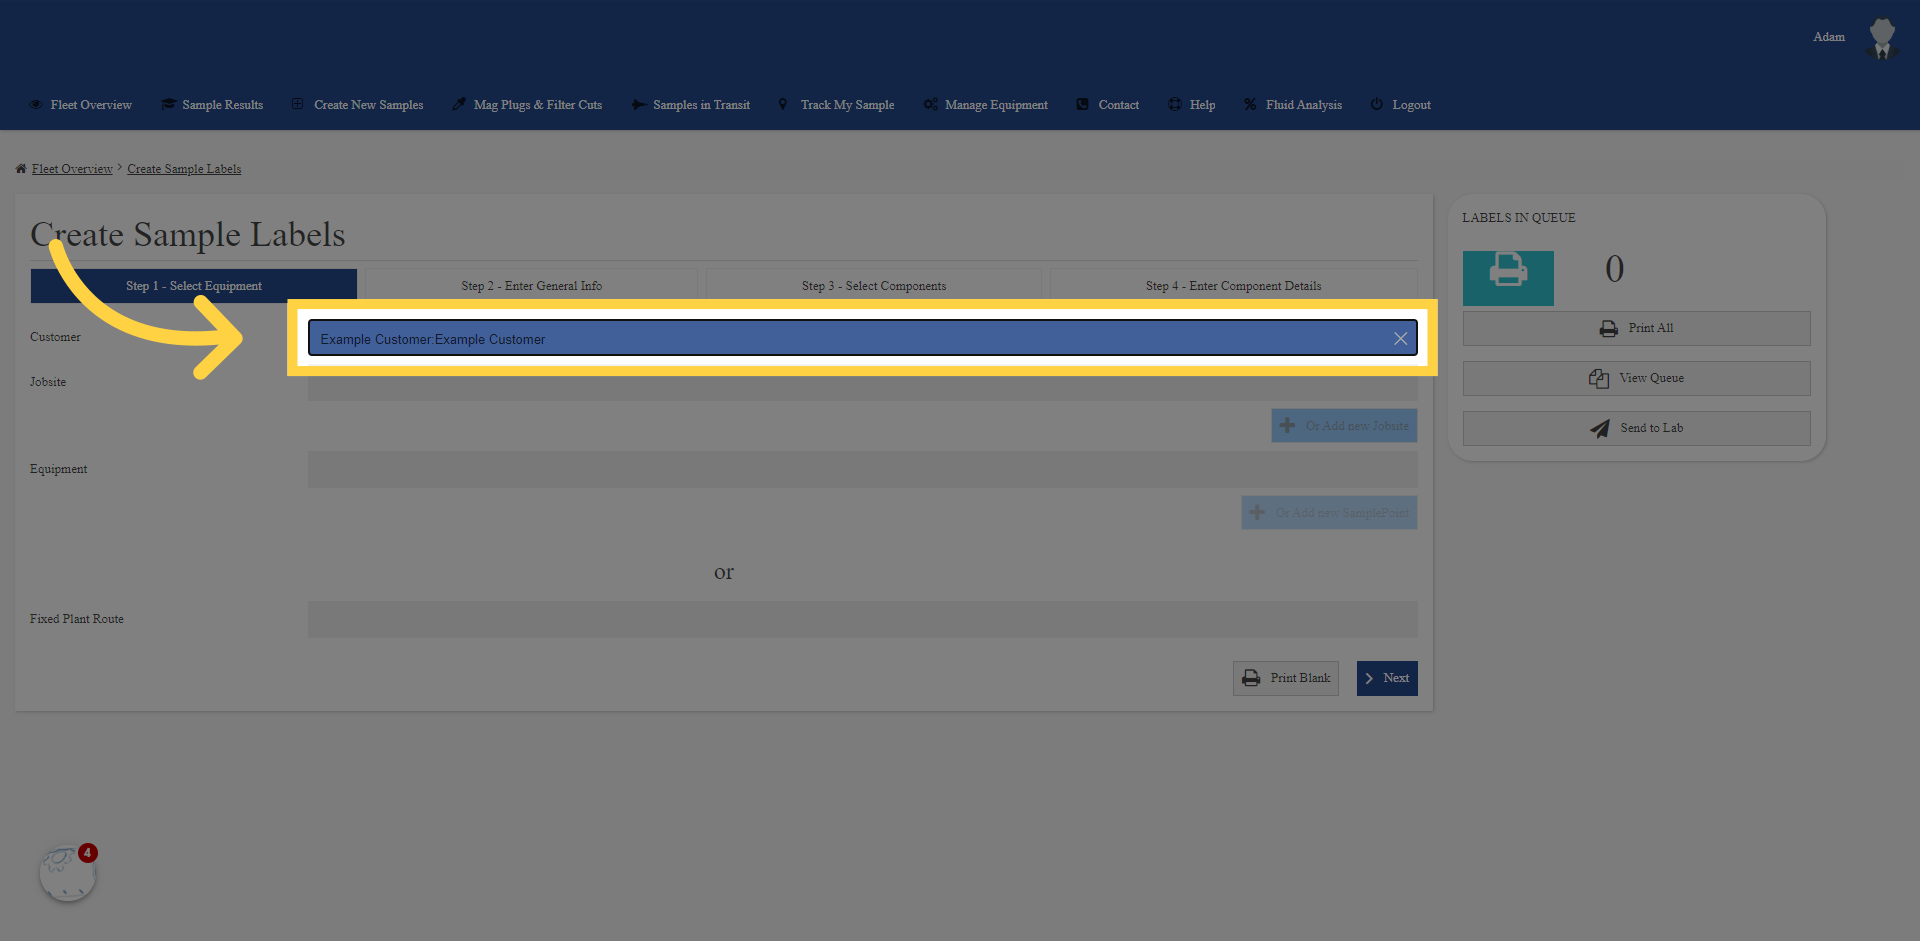
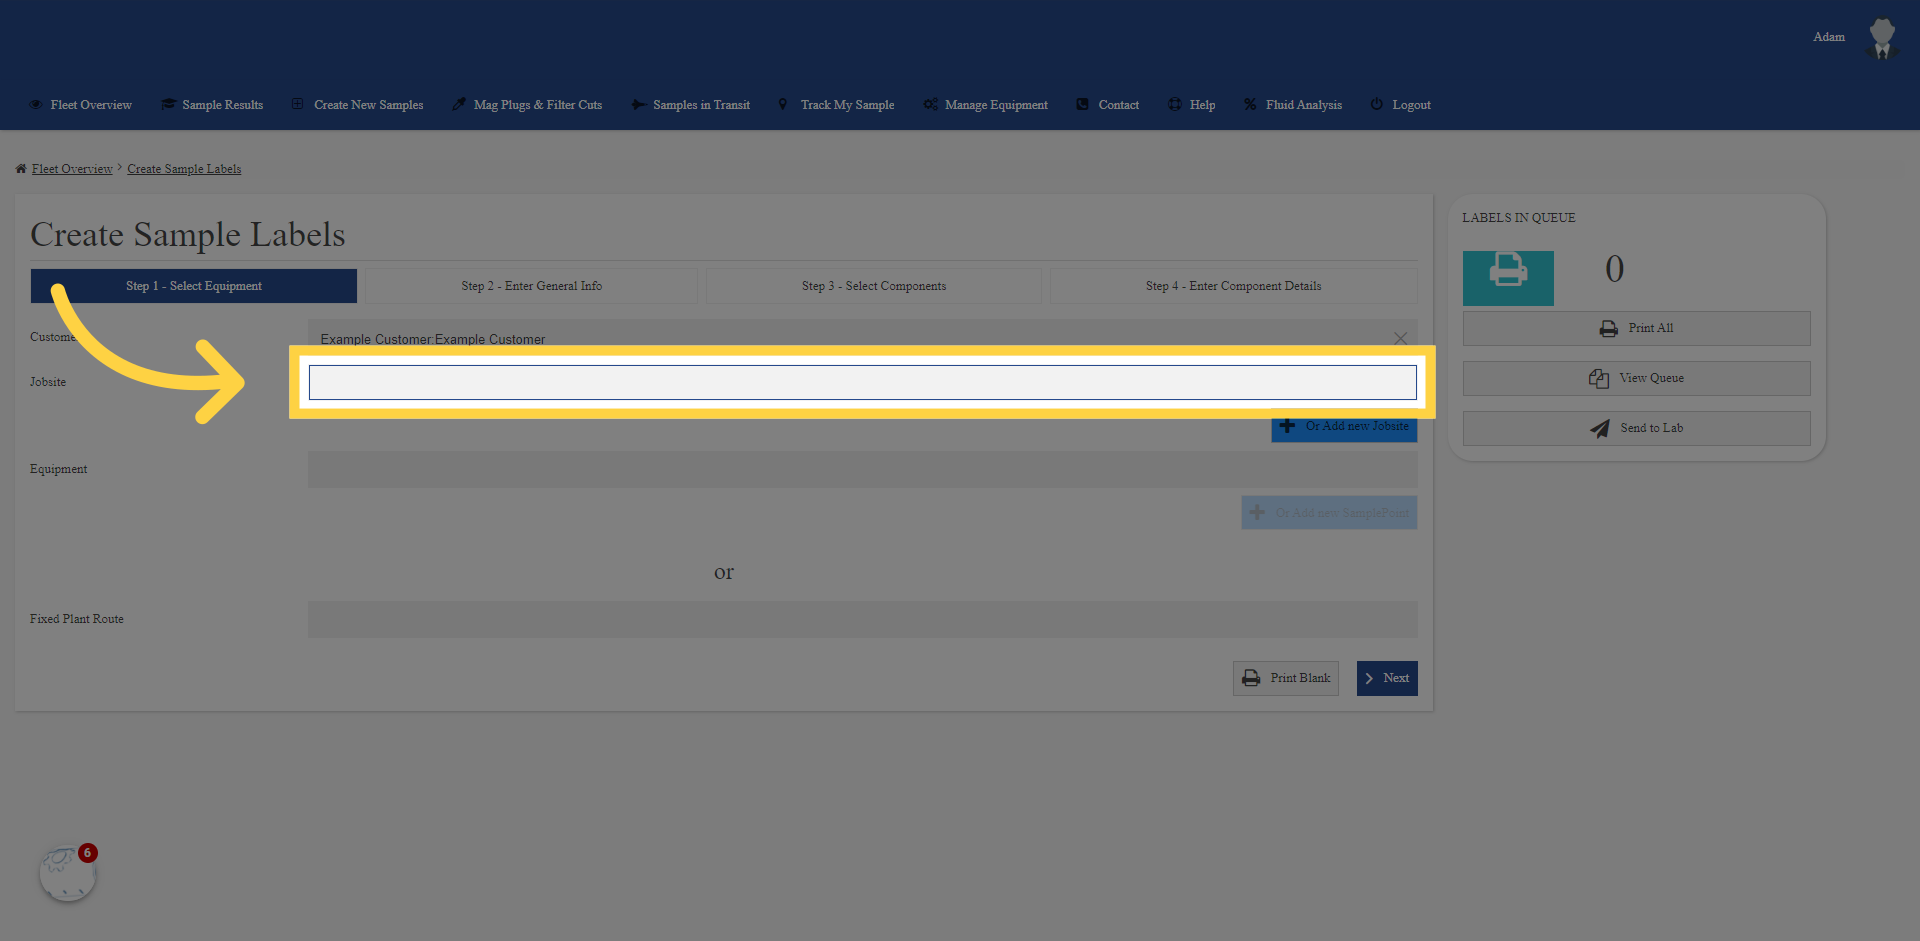
3. Pick Jobsite
If your company name is in the jobsite you will only have one option to pick. In this case, you can use sampled site field after clicking “next” on the bottom of this page, to fill in your end customer details, if needed.
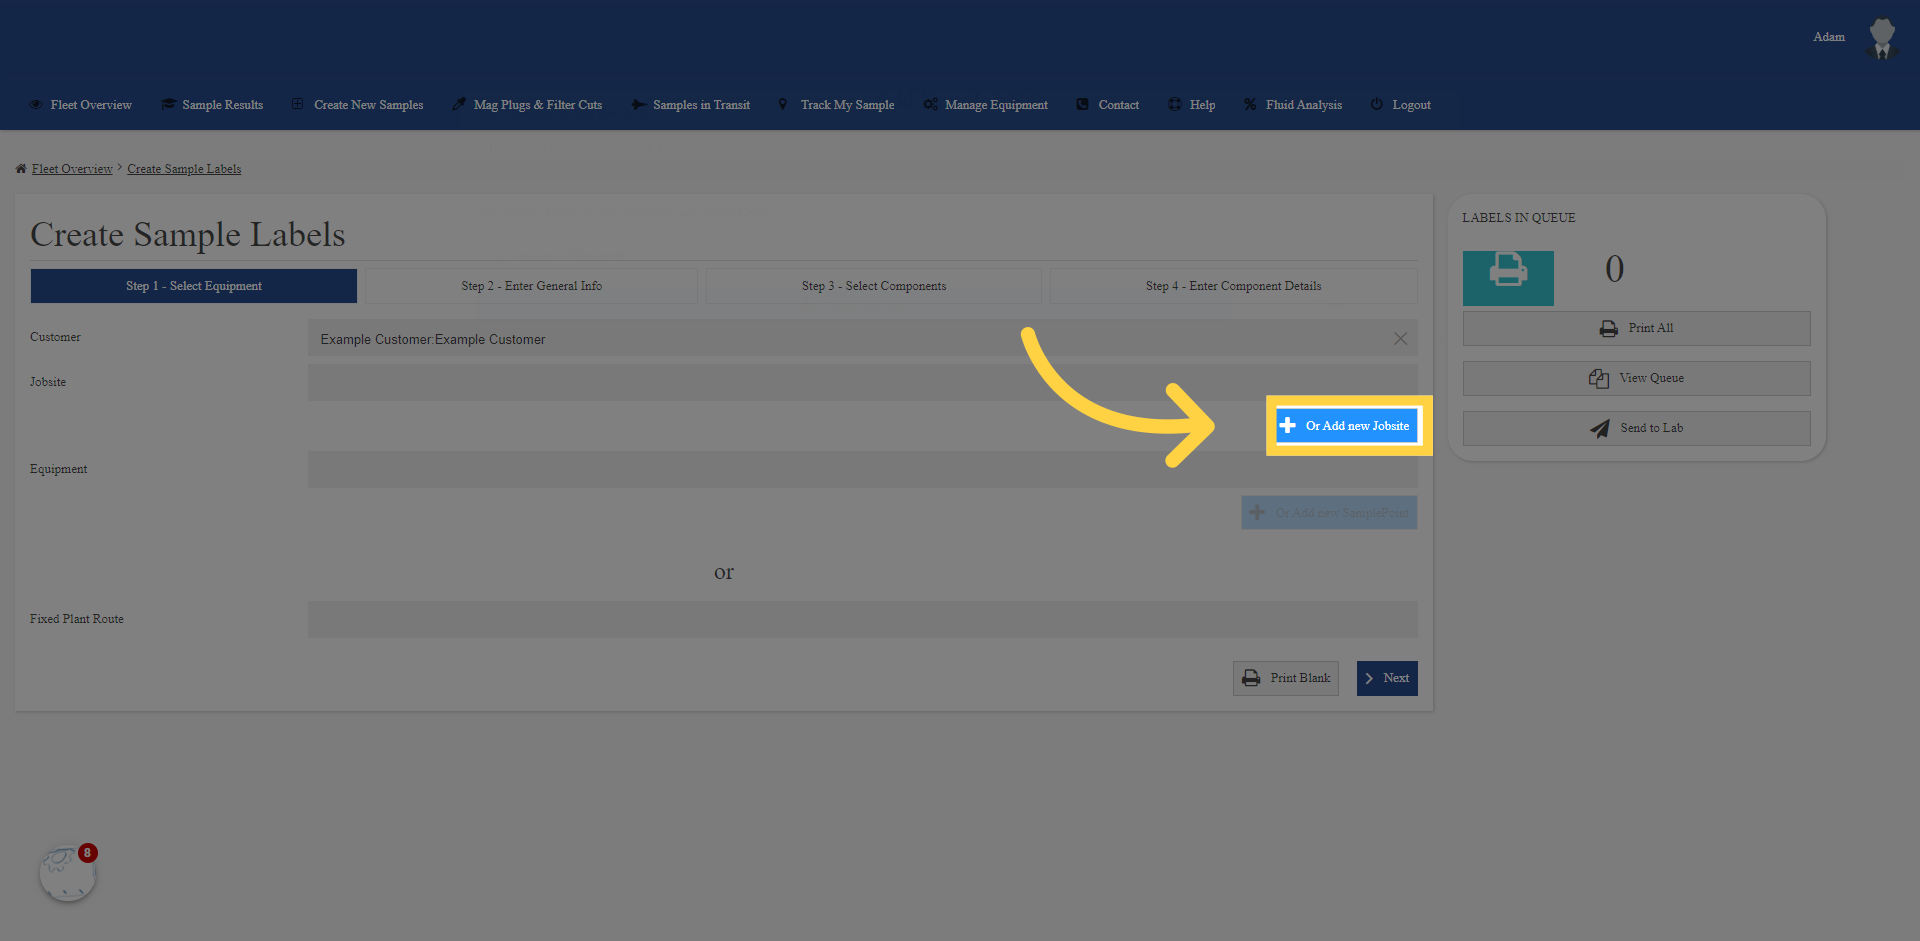
4. If Jobsite is not there. Click Add new Job Site
If your company name was in the top customer box, and, you have access to all its sites on your access, you can add additional sites to the jobsite list using the plus create new jobsite button. Please make sure they are not already in your job site list first to avoid duplicate sites.
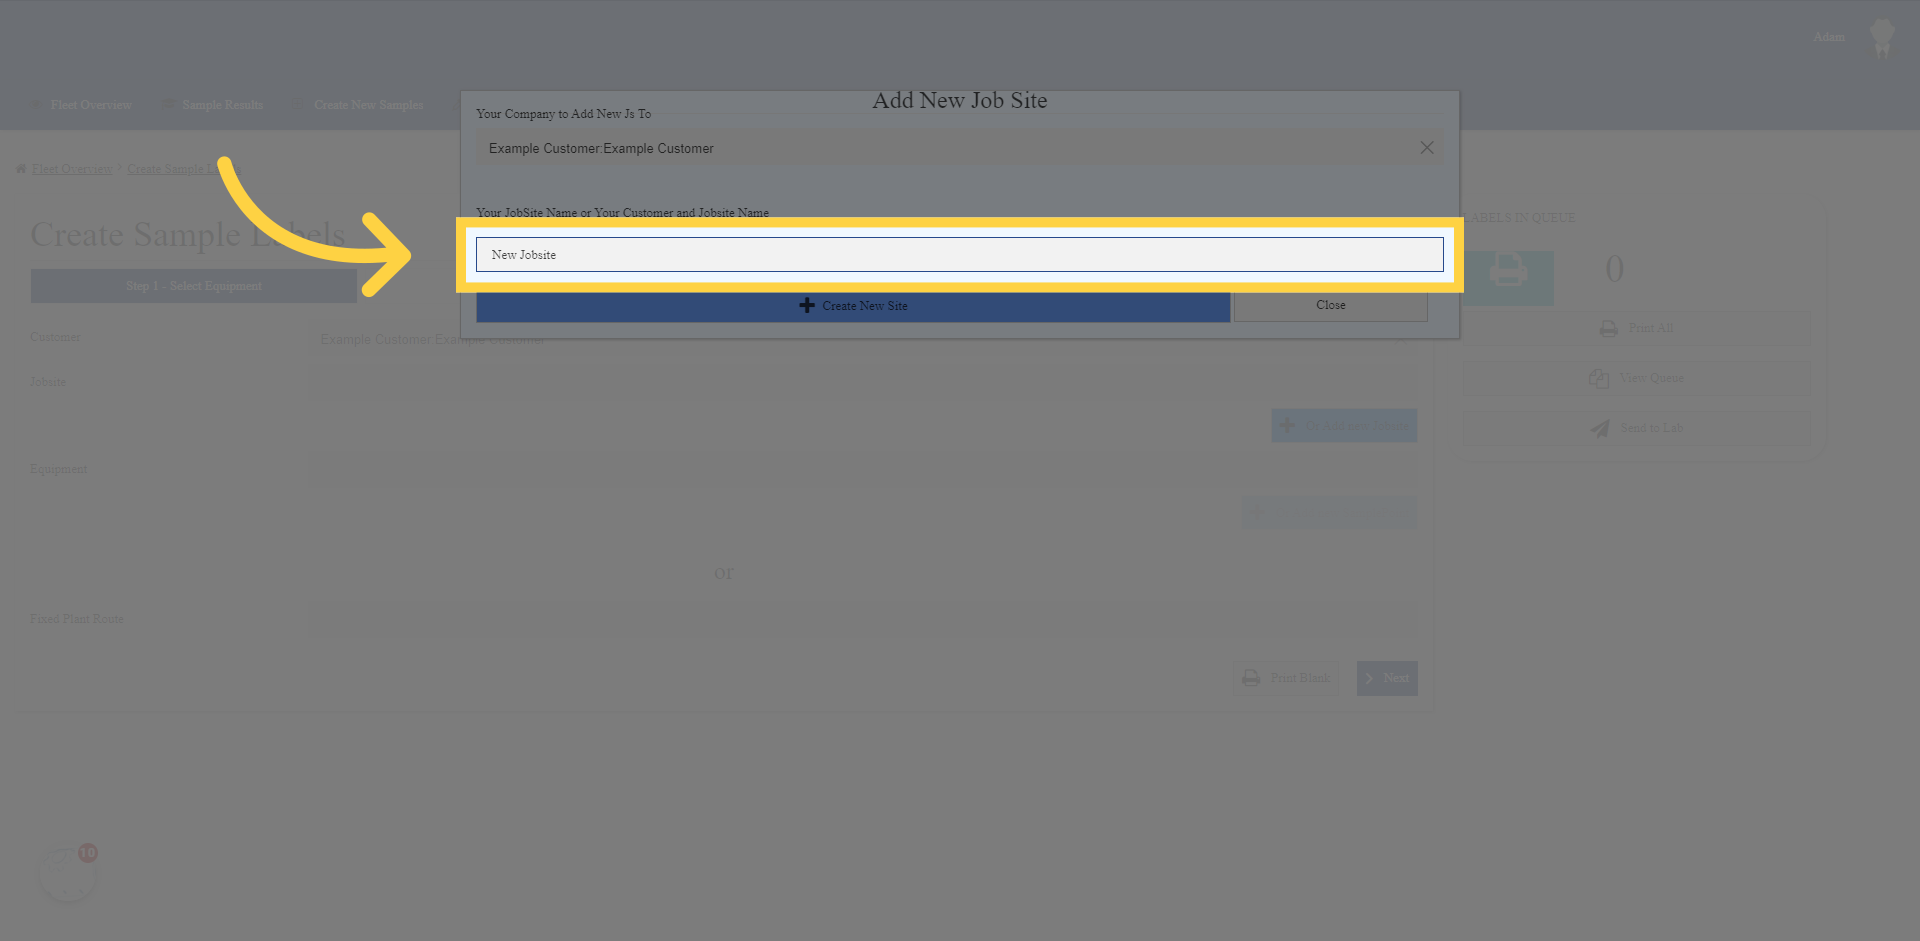
5. Fill the New Jobsite name
A new popup will appear. Enter the name of the “New Jobsite” here making sure you check your spelling.
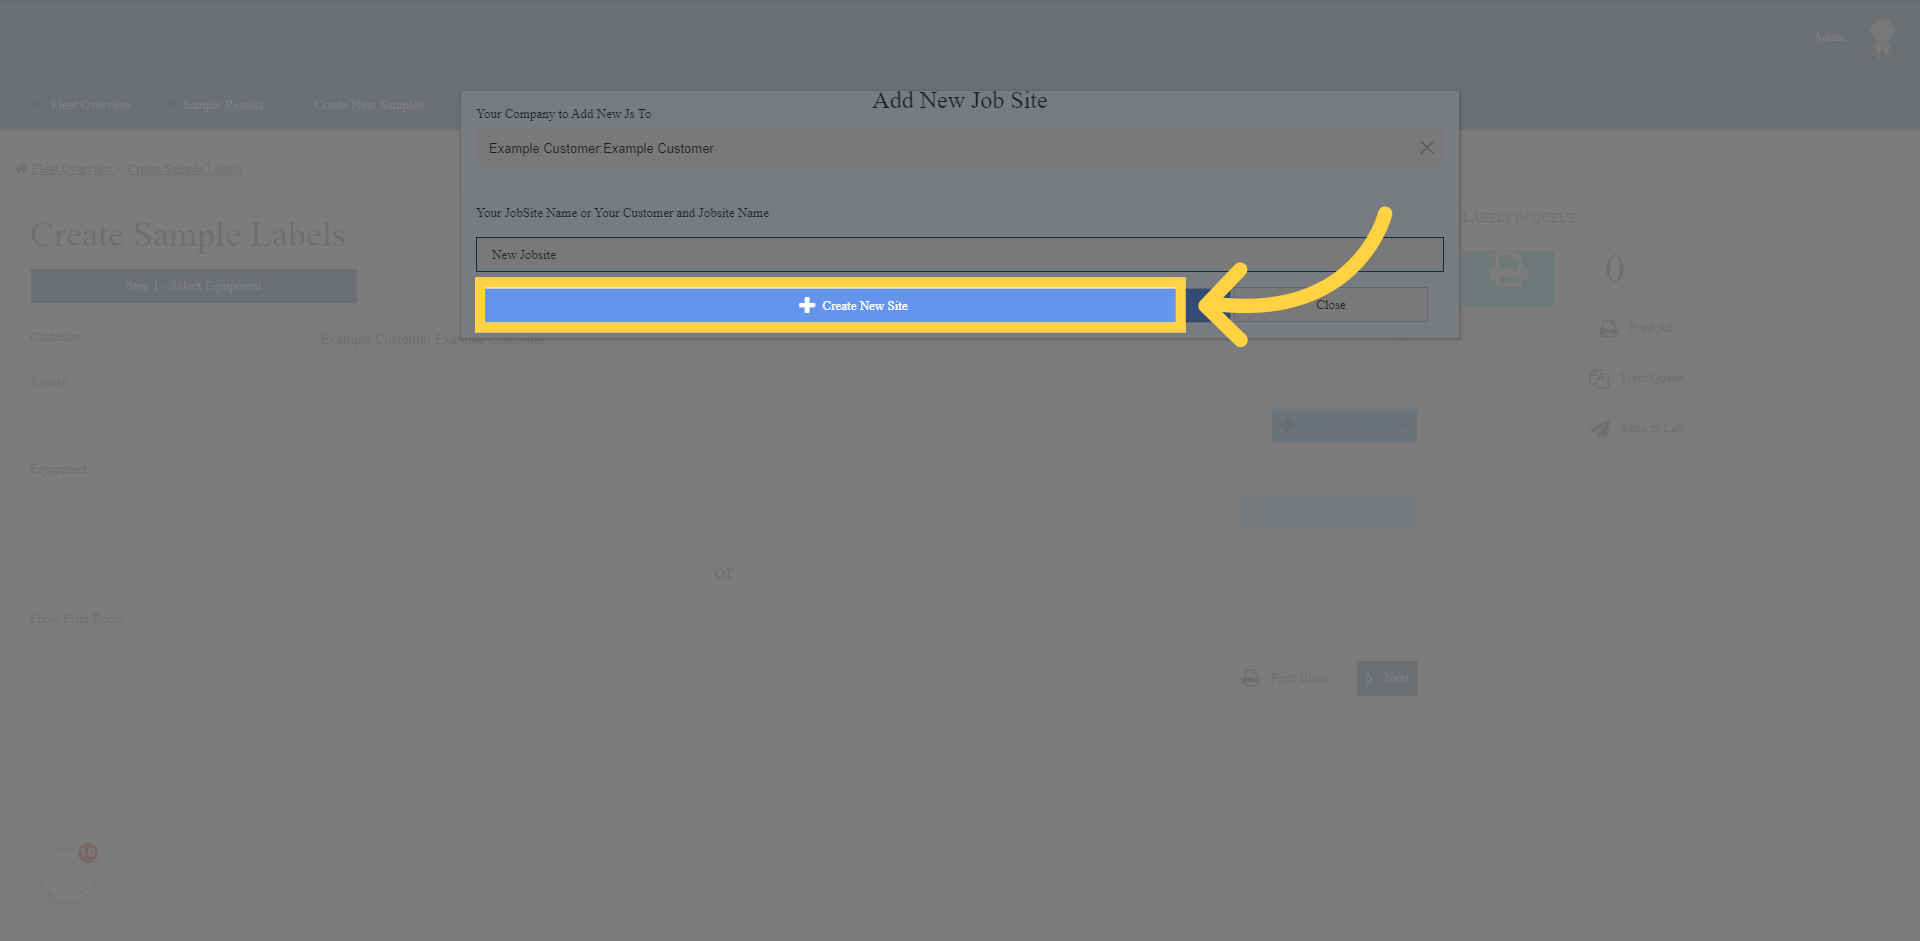
6. Click “Create New Site”
You can now click “Create New Site” button.
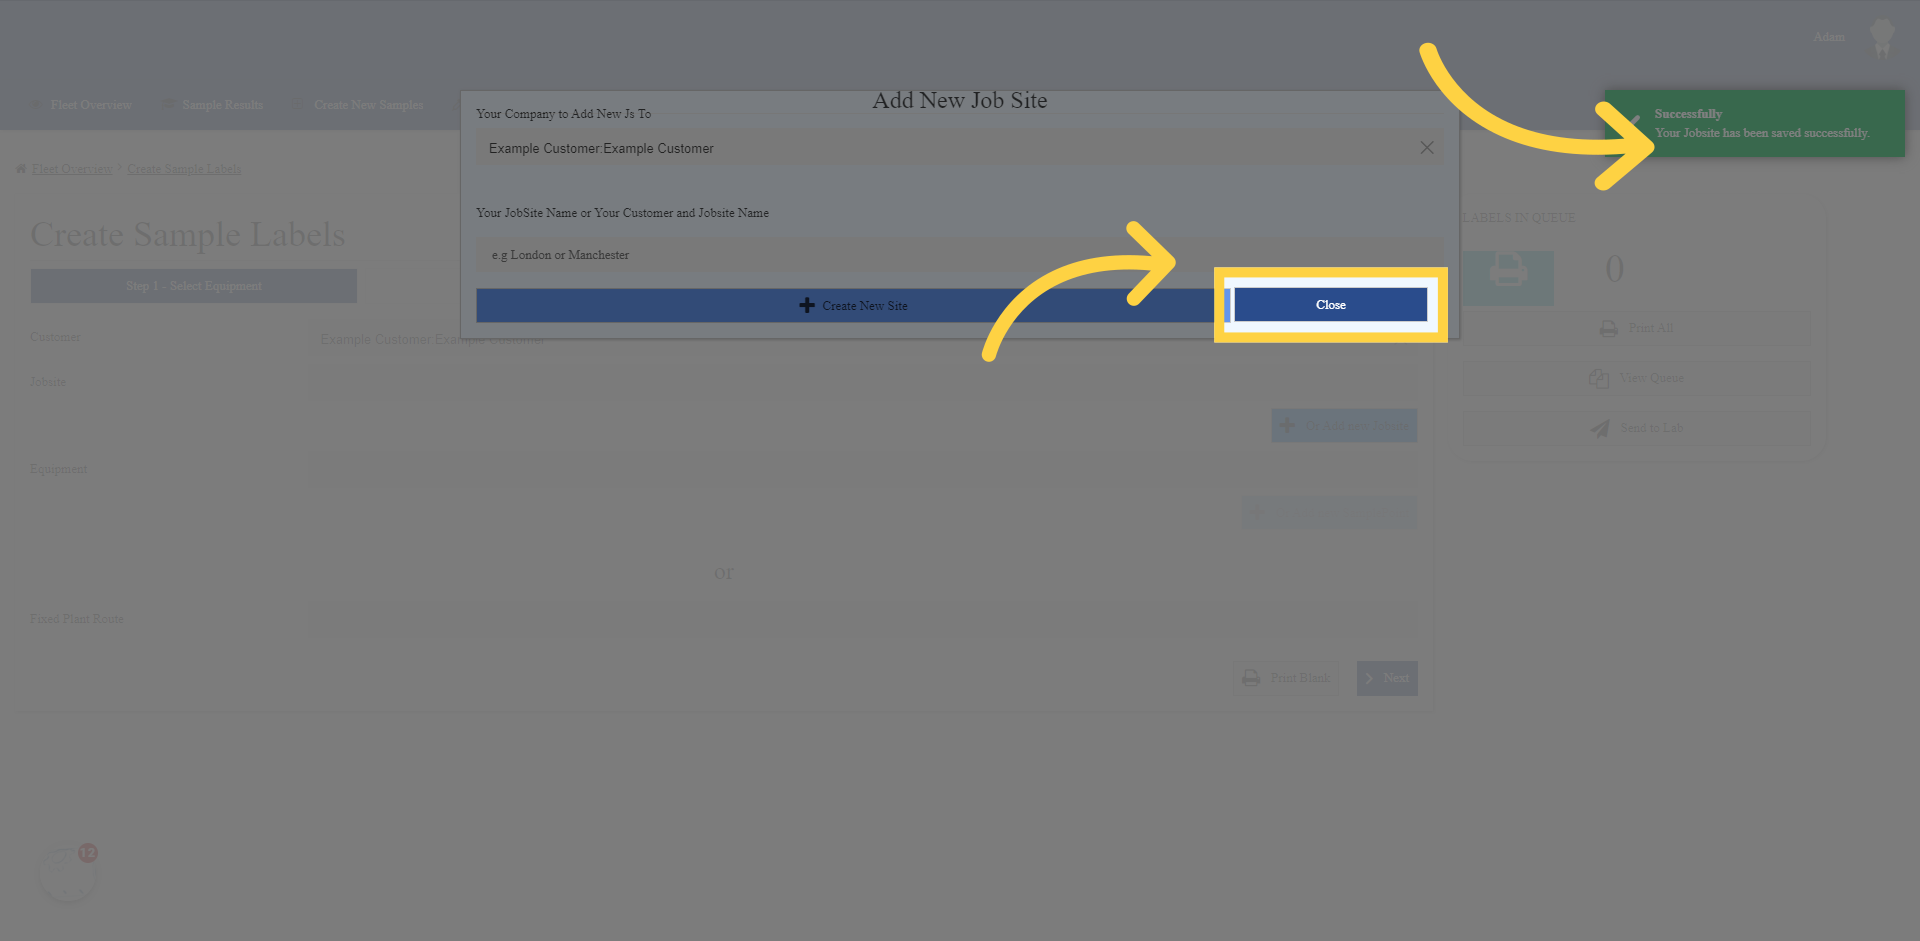
7. Look out for the green success message and then Click “Close”
A Green success box should appear in the top right corner to show it worked. Repeat creating as many new sites as you need. When done, click the “Close” button to return to the list.
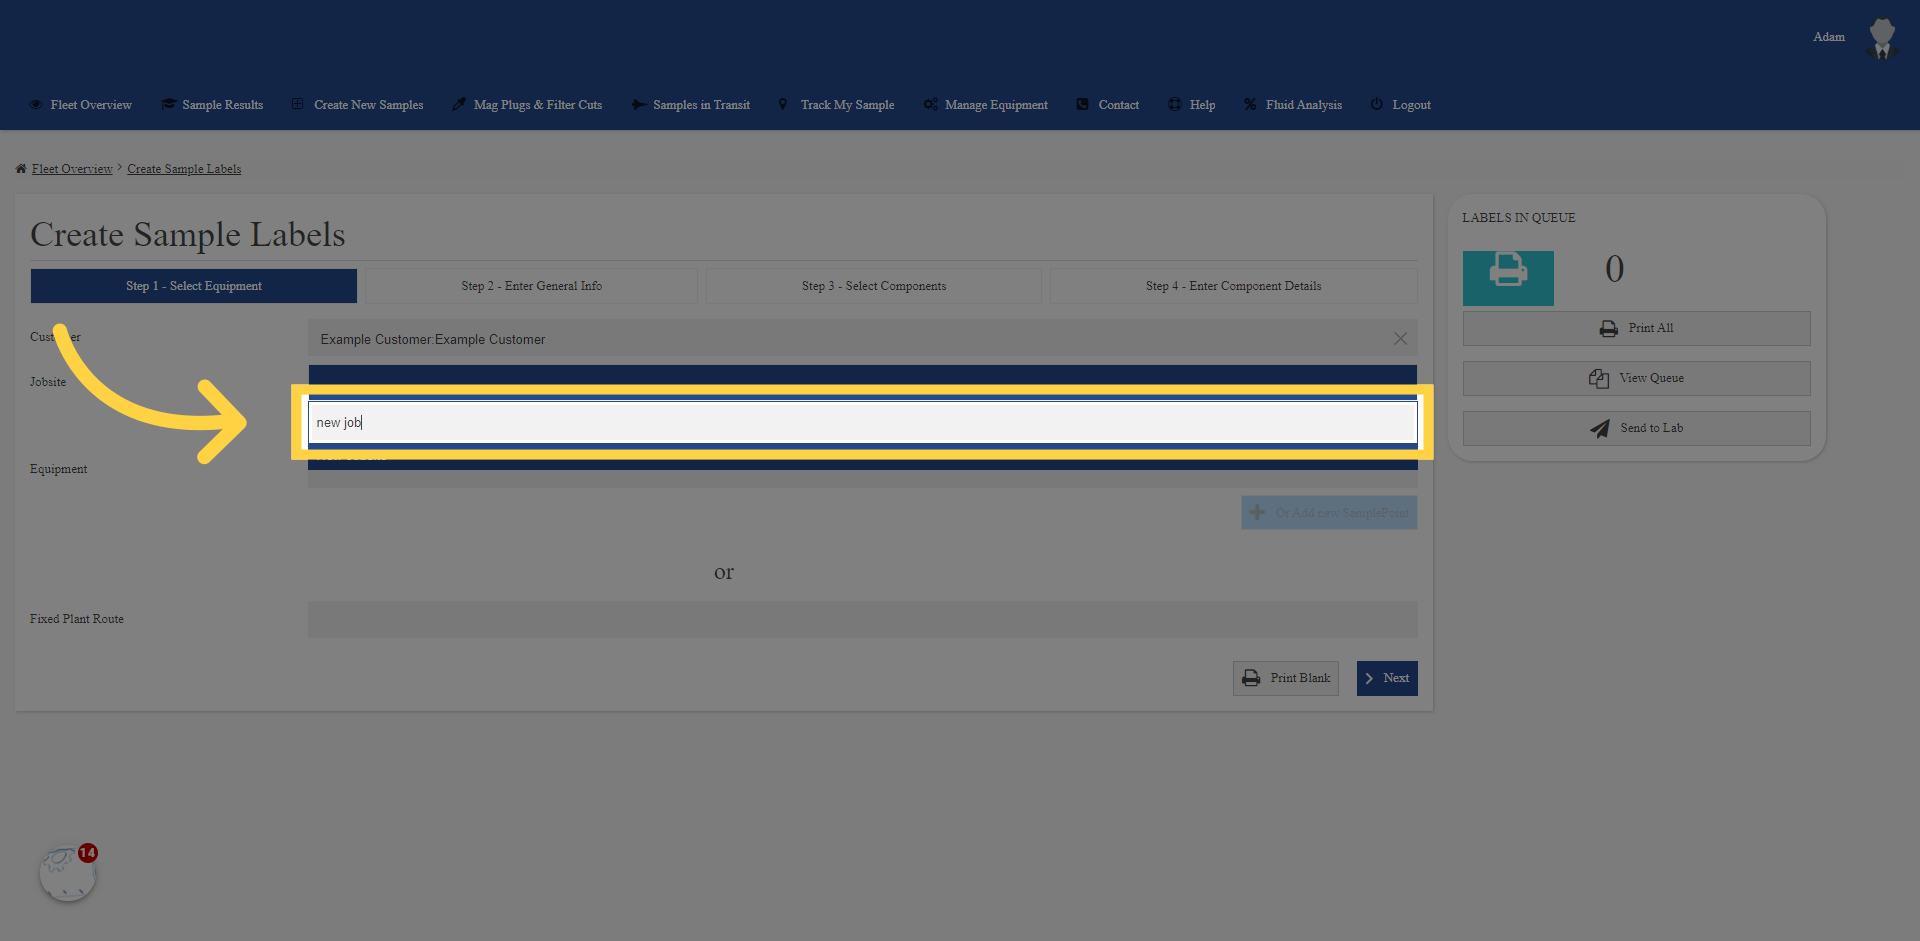
8. Pick or type Jobsite to search
You can either click and pick, or start typing the name of the jobsite you want in the jobsite box; the search will narrow for you as you do this. If you don’t see your newly created site, it means you don’t have access to all the sites under customer in the top box, and only have access to selected sites. Your new sites you created won’t be in this selected site list. If this is wrong and you need access to all sites under the top customer, reach out by emailing the lab for assistance.
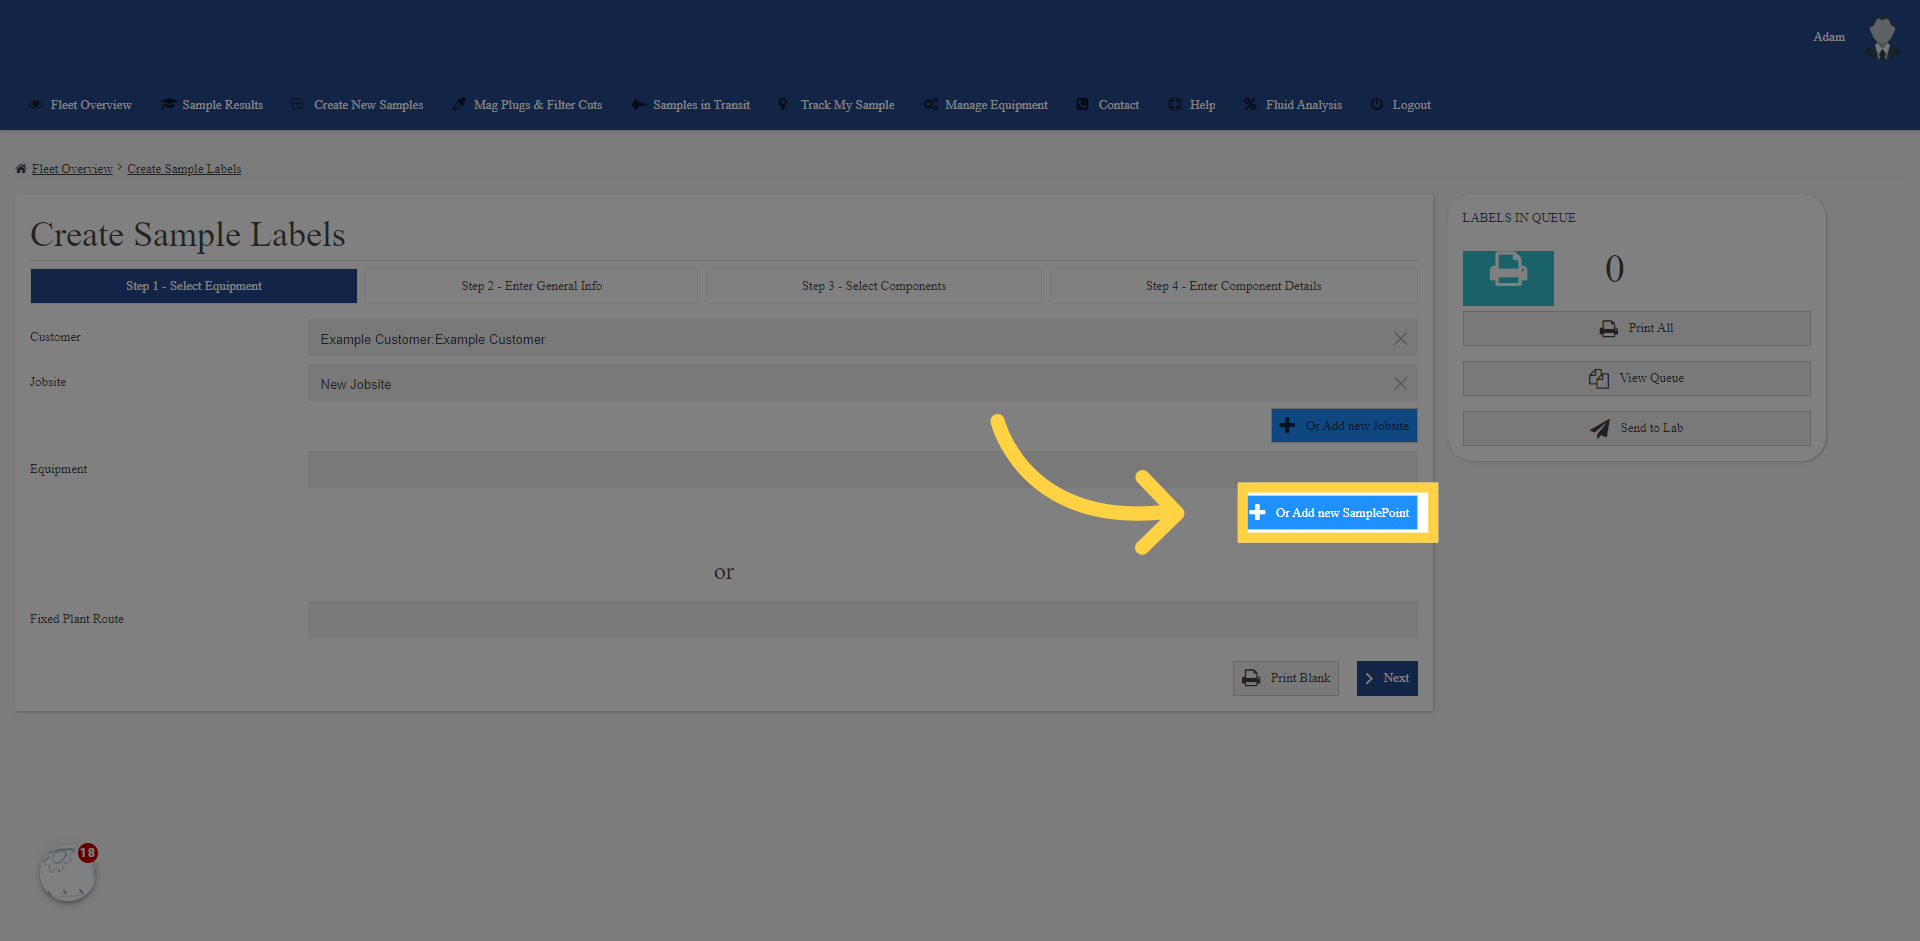
9. Pick a machine on the left, or add a new sample point
In the equipment drop down, that’s the third box down, you would see a list of all your machines, but since we just created a new site, there are no machines on it yet. So we will skip checking your equipment list and go straight to the add new sample point option.
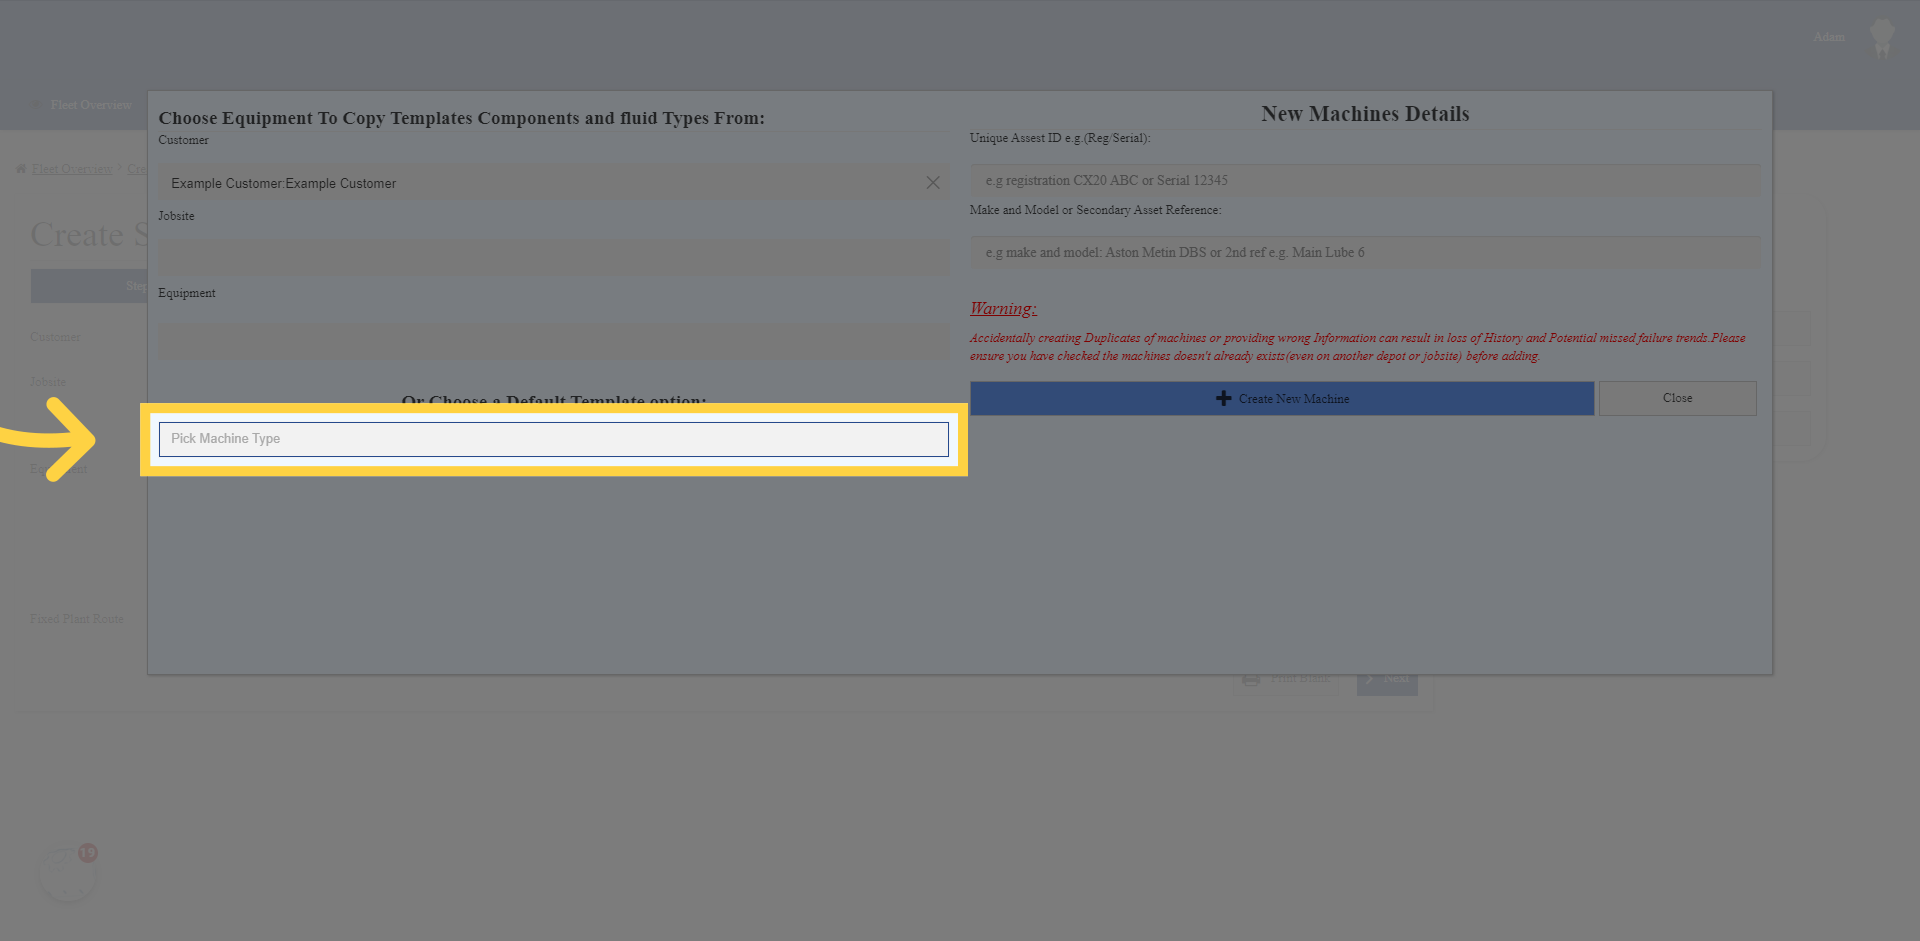
10. Click “Pick Machine Type”
A new popup will appear. Ignore everything on the left except the bottom drop down box. On the LubeWear Go app, the bits you can ignore have already been removed and the first box to fill will be the “Pick machine type”. However, since this is a PC tutorial, Click the “Pick Machine Type” dropdown.
11. Pick an option
You can pick, or start typing for an option list
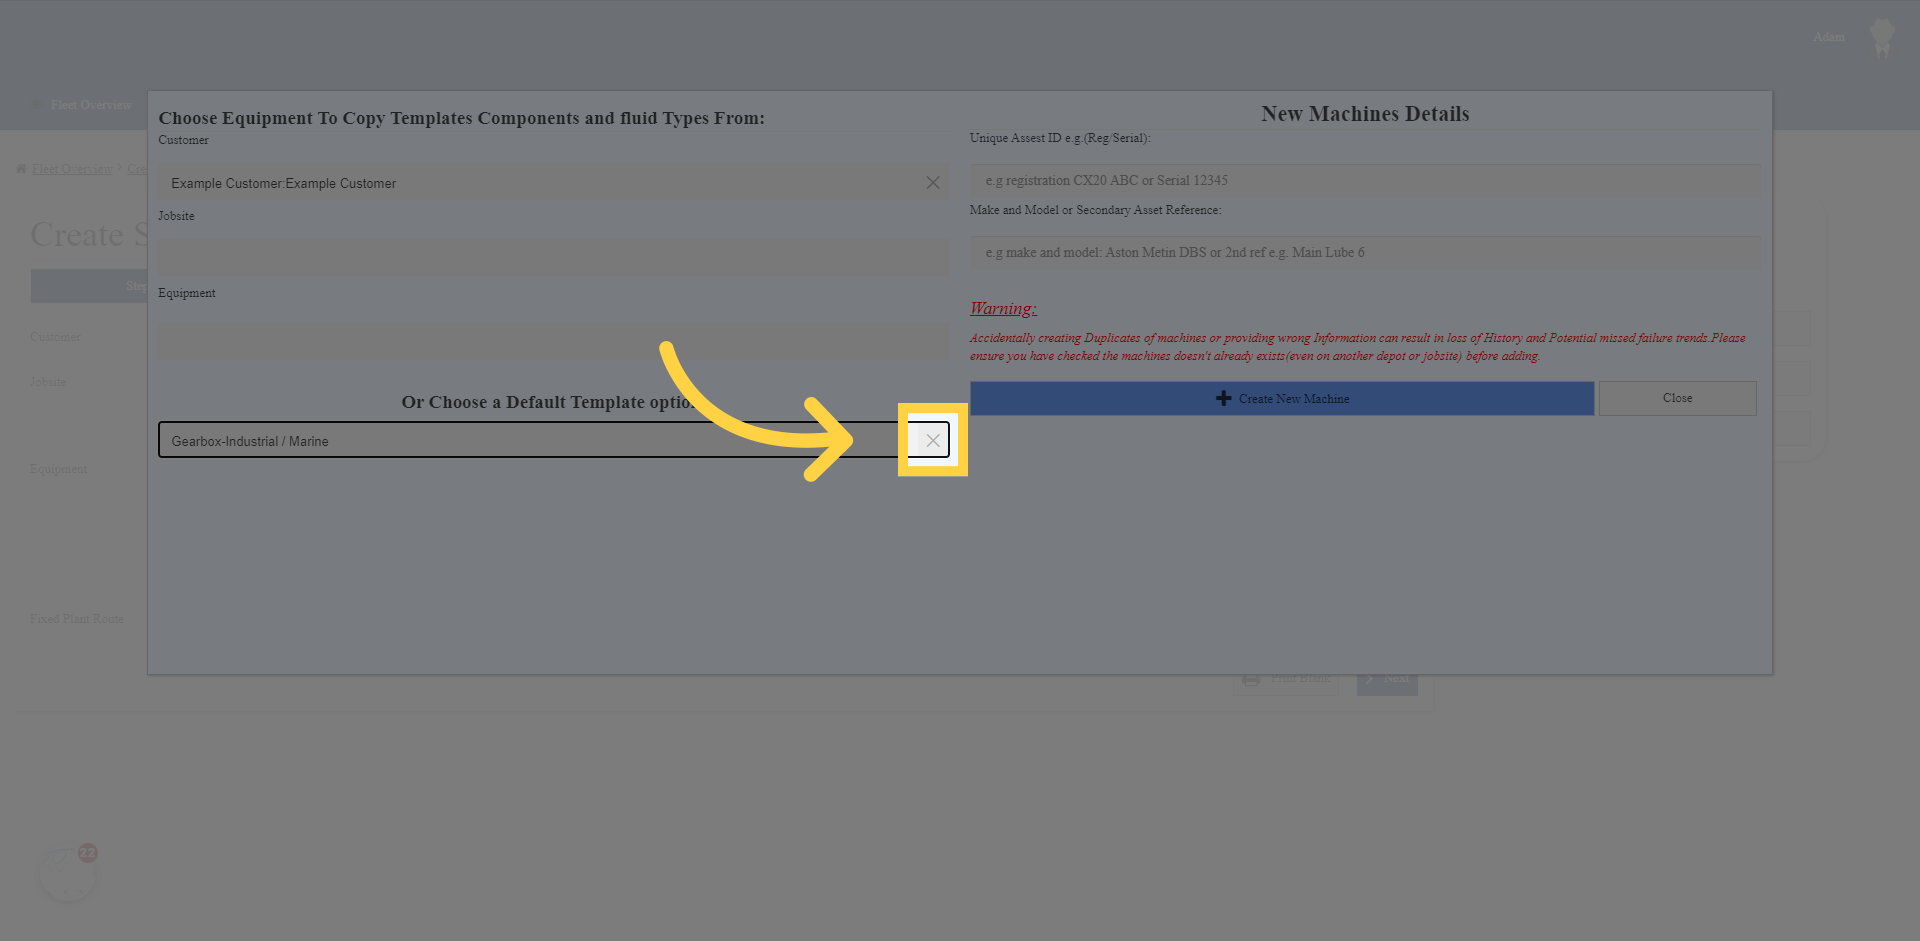
12. Click “✕” if you made a mistake
You can click the cross “✕” button in the box to clear the selected option if you made a mistake at any time.
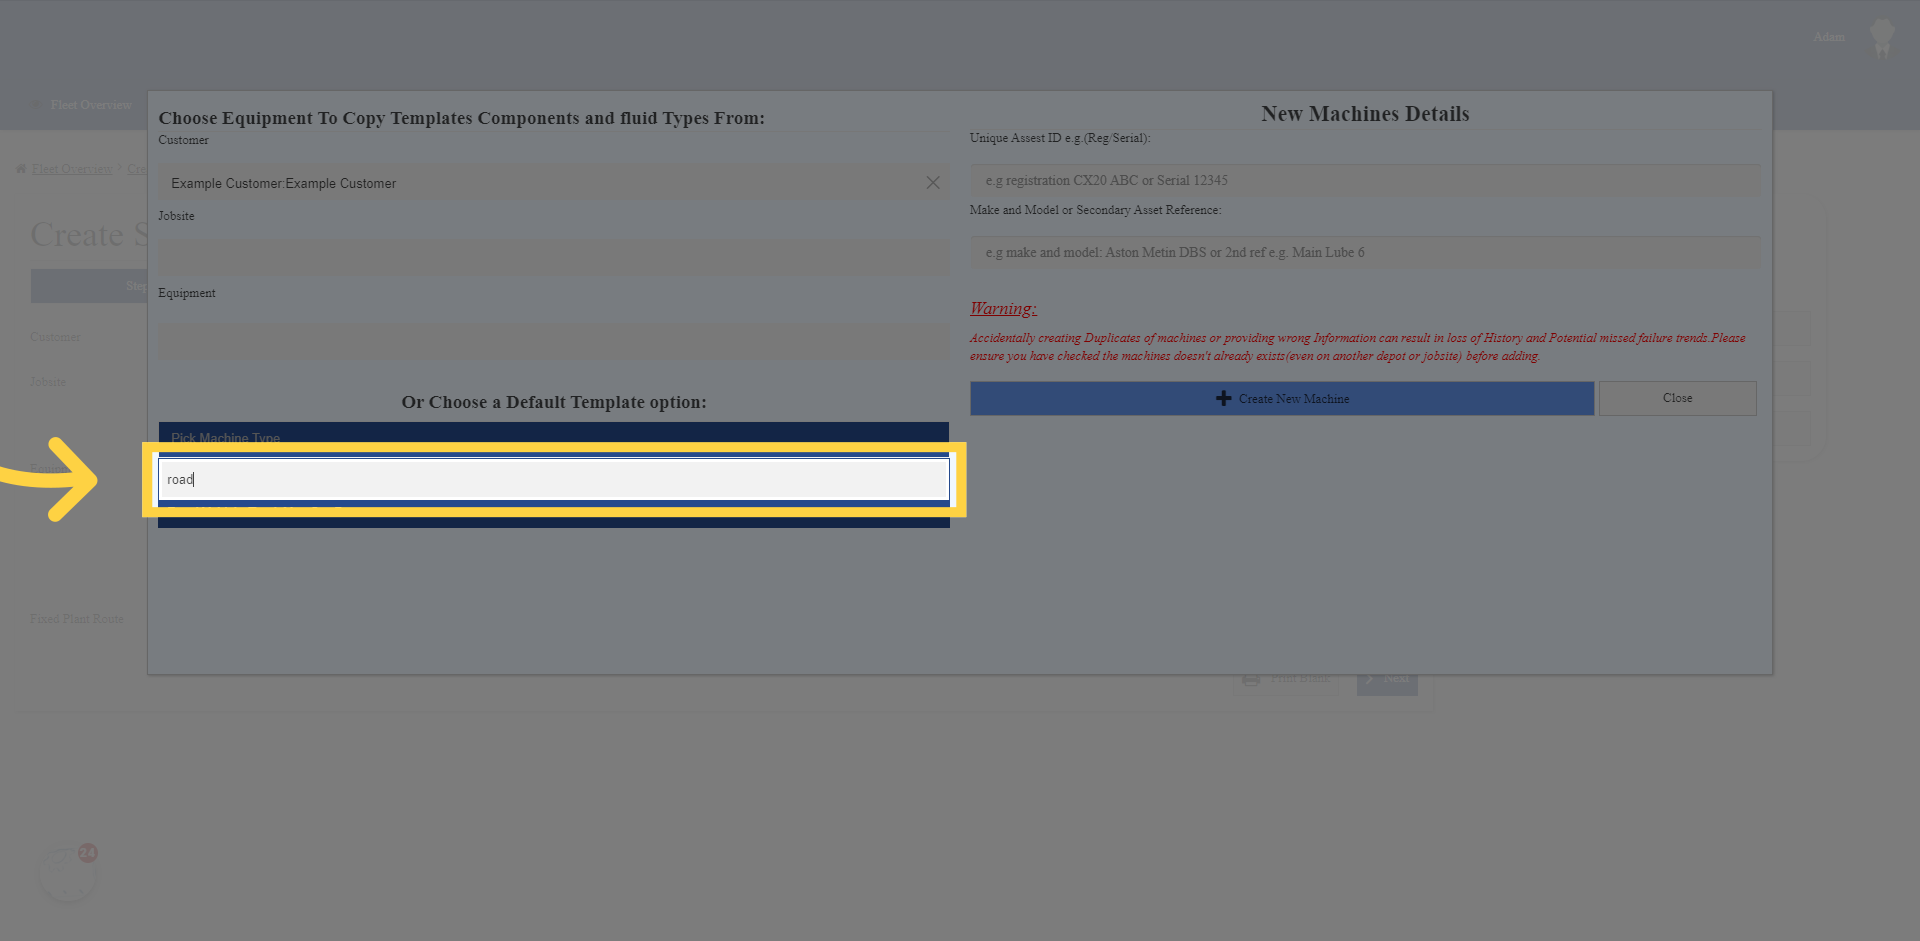
13. e.g. pick road
If its a road going vehicle use the road option as your best bet.
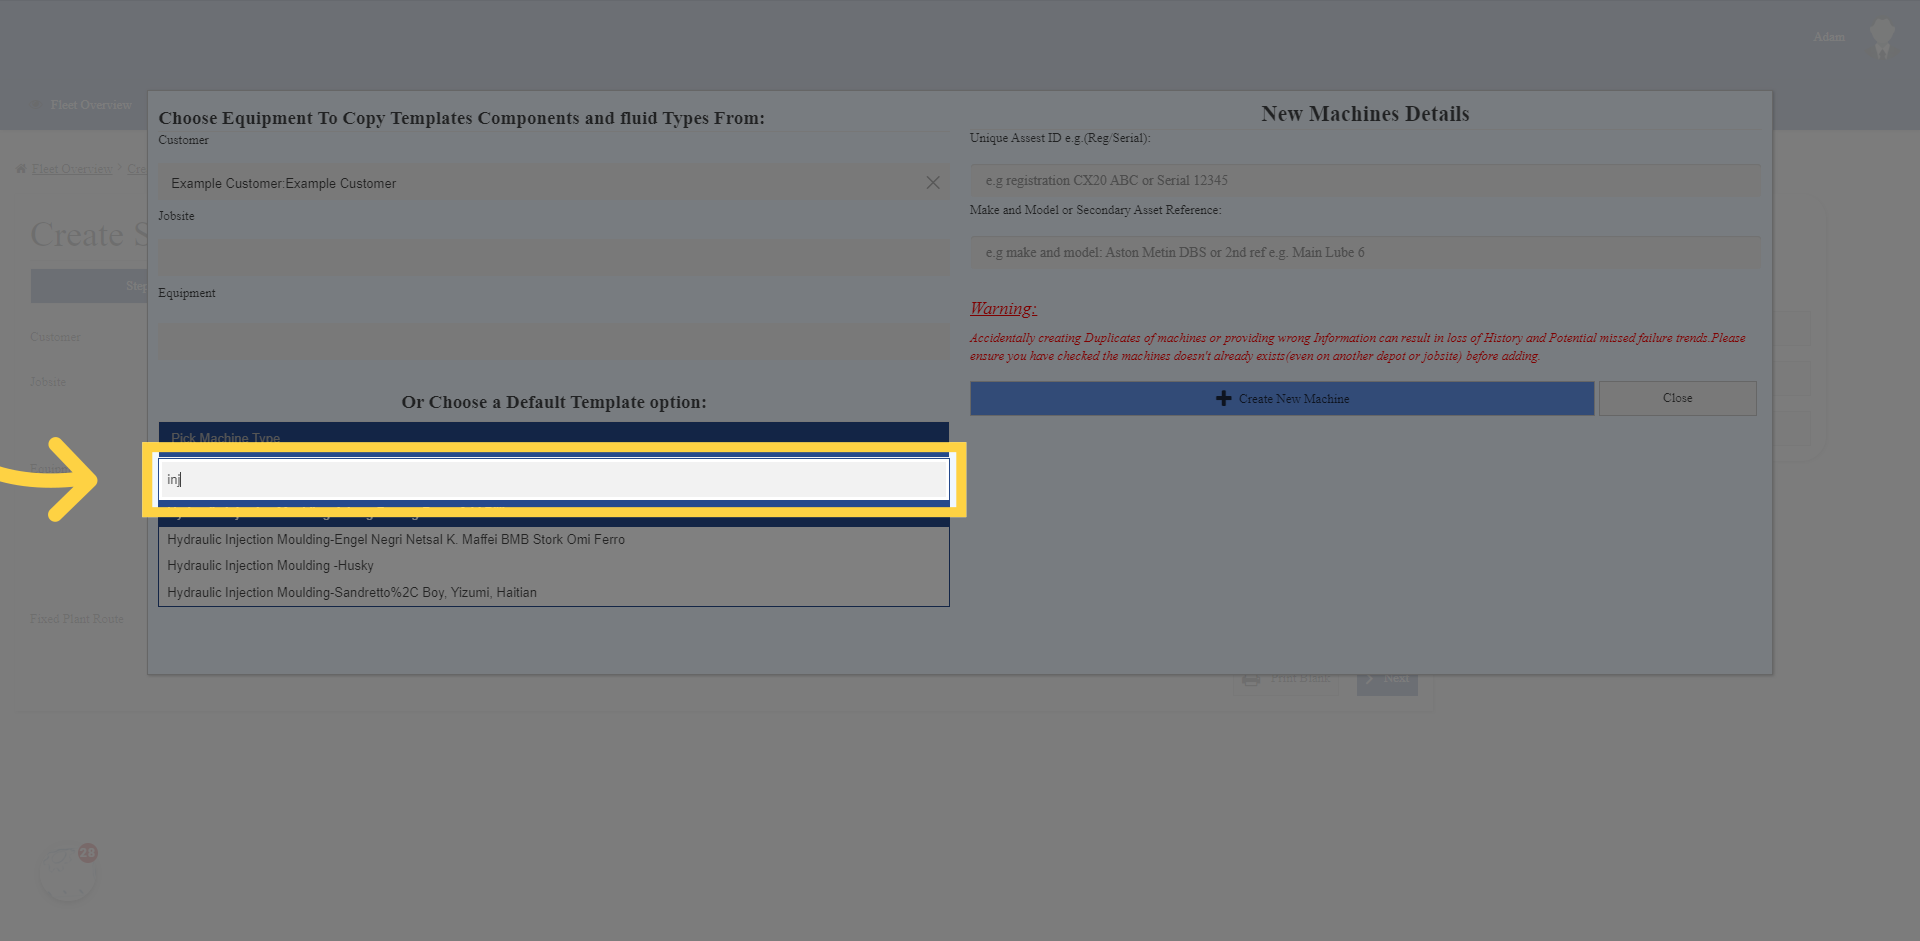
14. or pick Injection Moulding
You can search for options of injection moulding machines, for instance, I now have a list of injection moulding machines to pick.
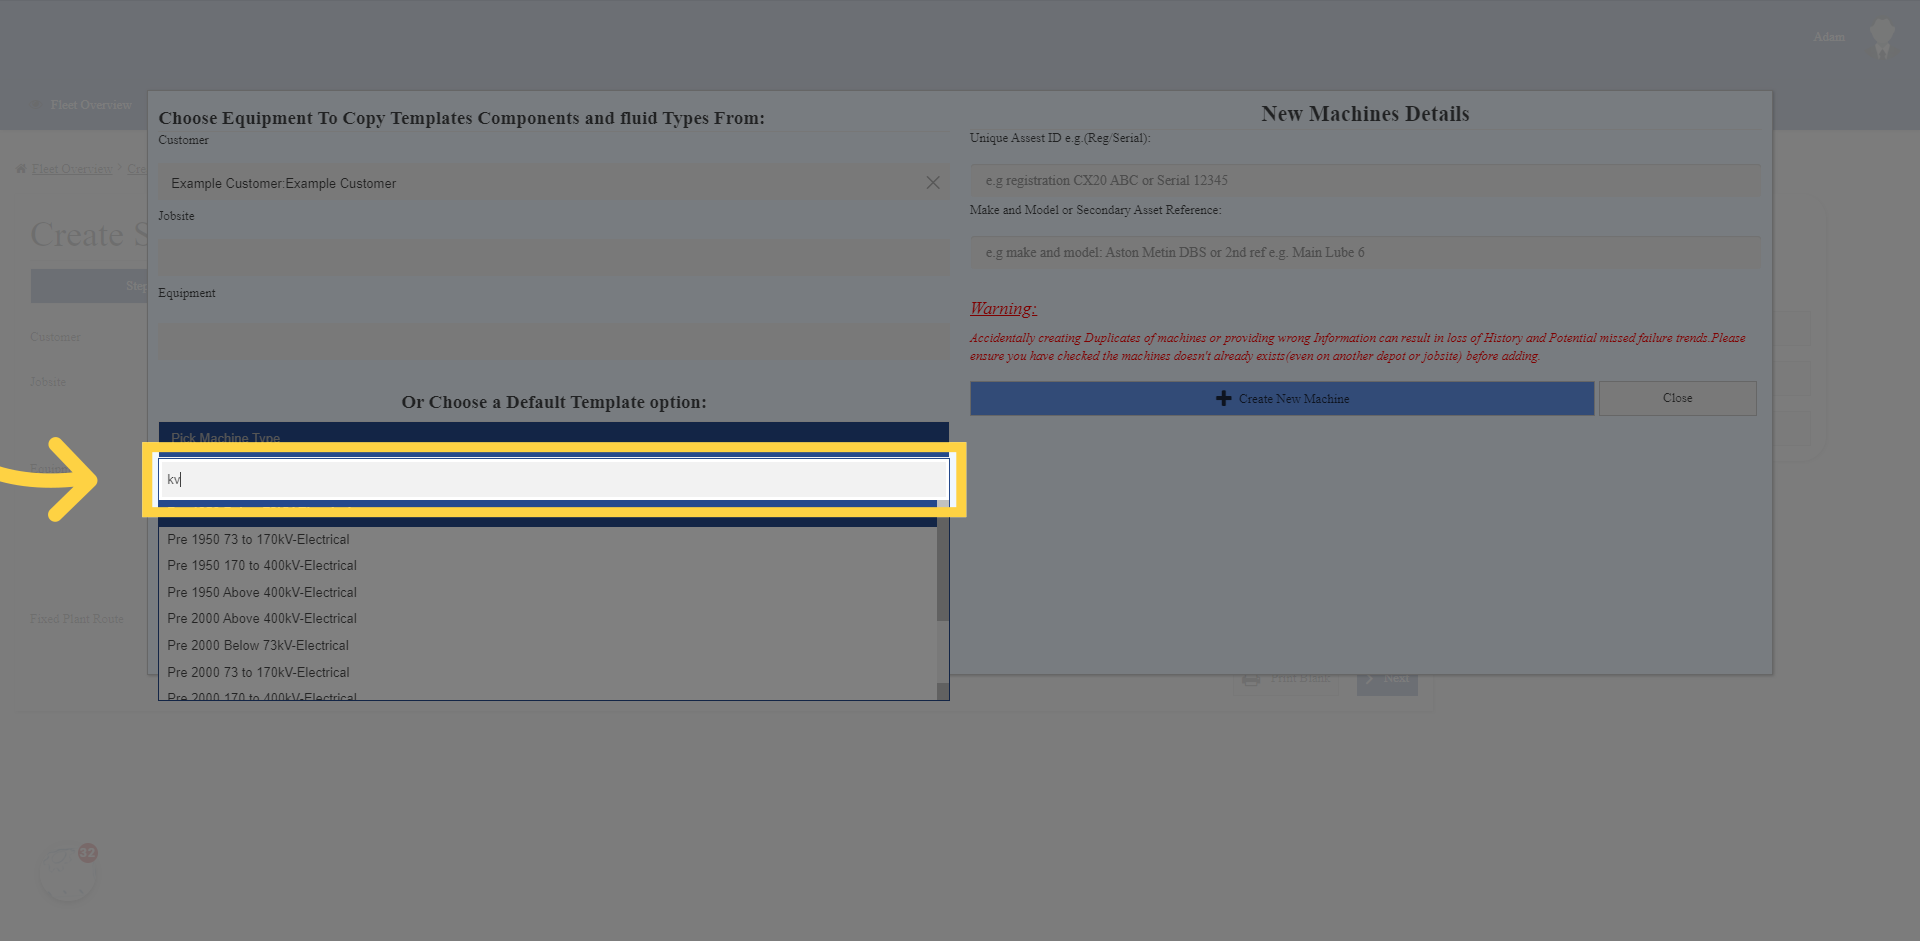
15. Fill “kv”
There are a lot of choices which may seem daunting, but as mentioned, road covers road vehicles, start typing construction for various digger options, industrial or marine for industrial options like hydraulics, generators, gearboxes etc. You can also use searches like bulk for bulk fuel or bulk adblue storage tanks and for electrical equipment start typing electrical to get a list of different year classes and voltage ranges for your equipment. Have a good look through and pick whats best, but if you are really stuck reach out to the lab for help.
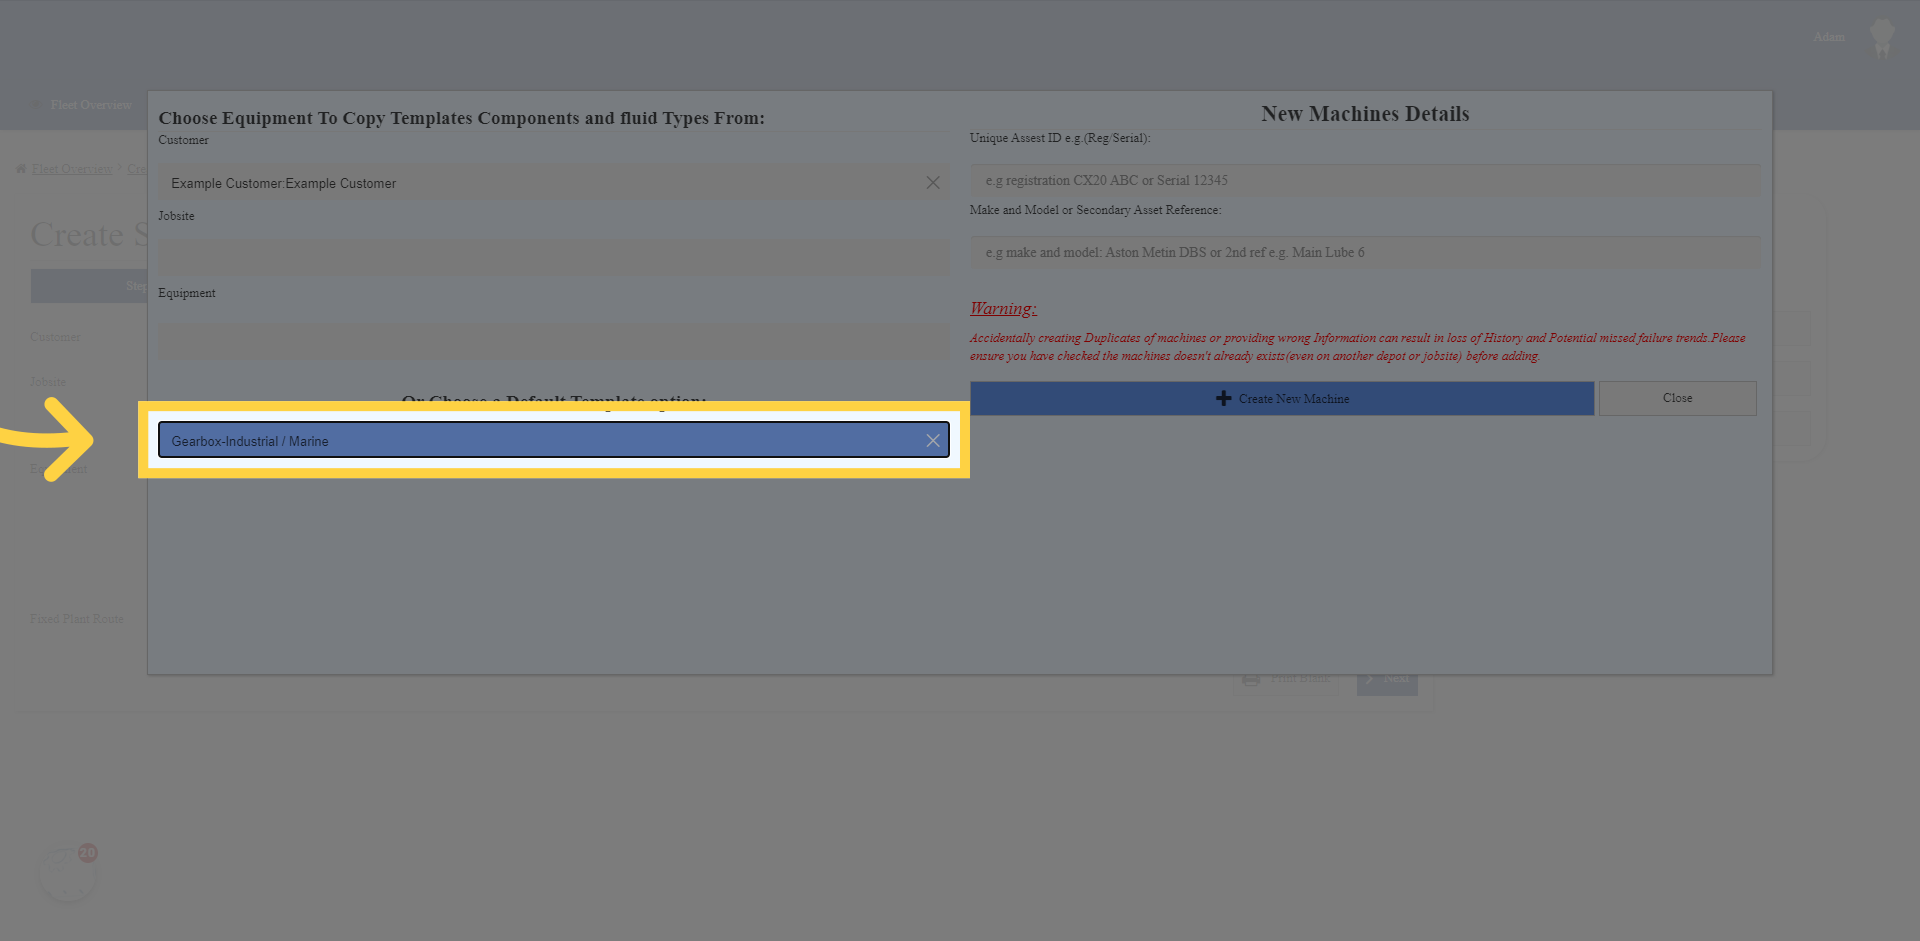
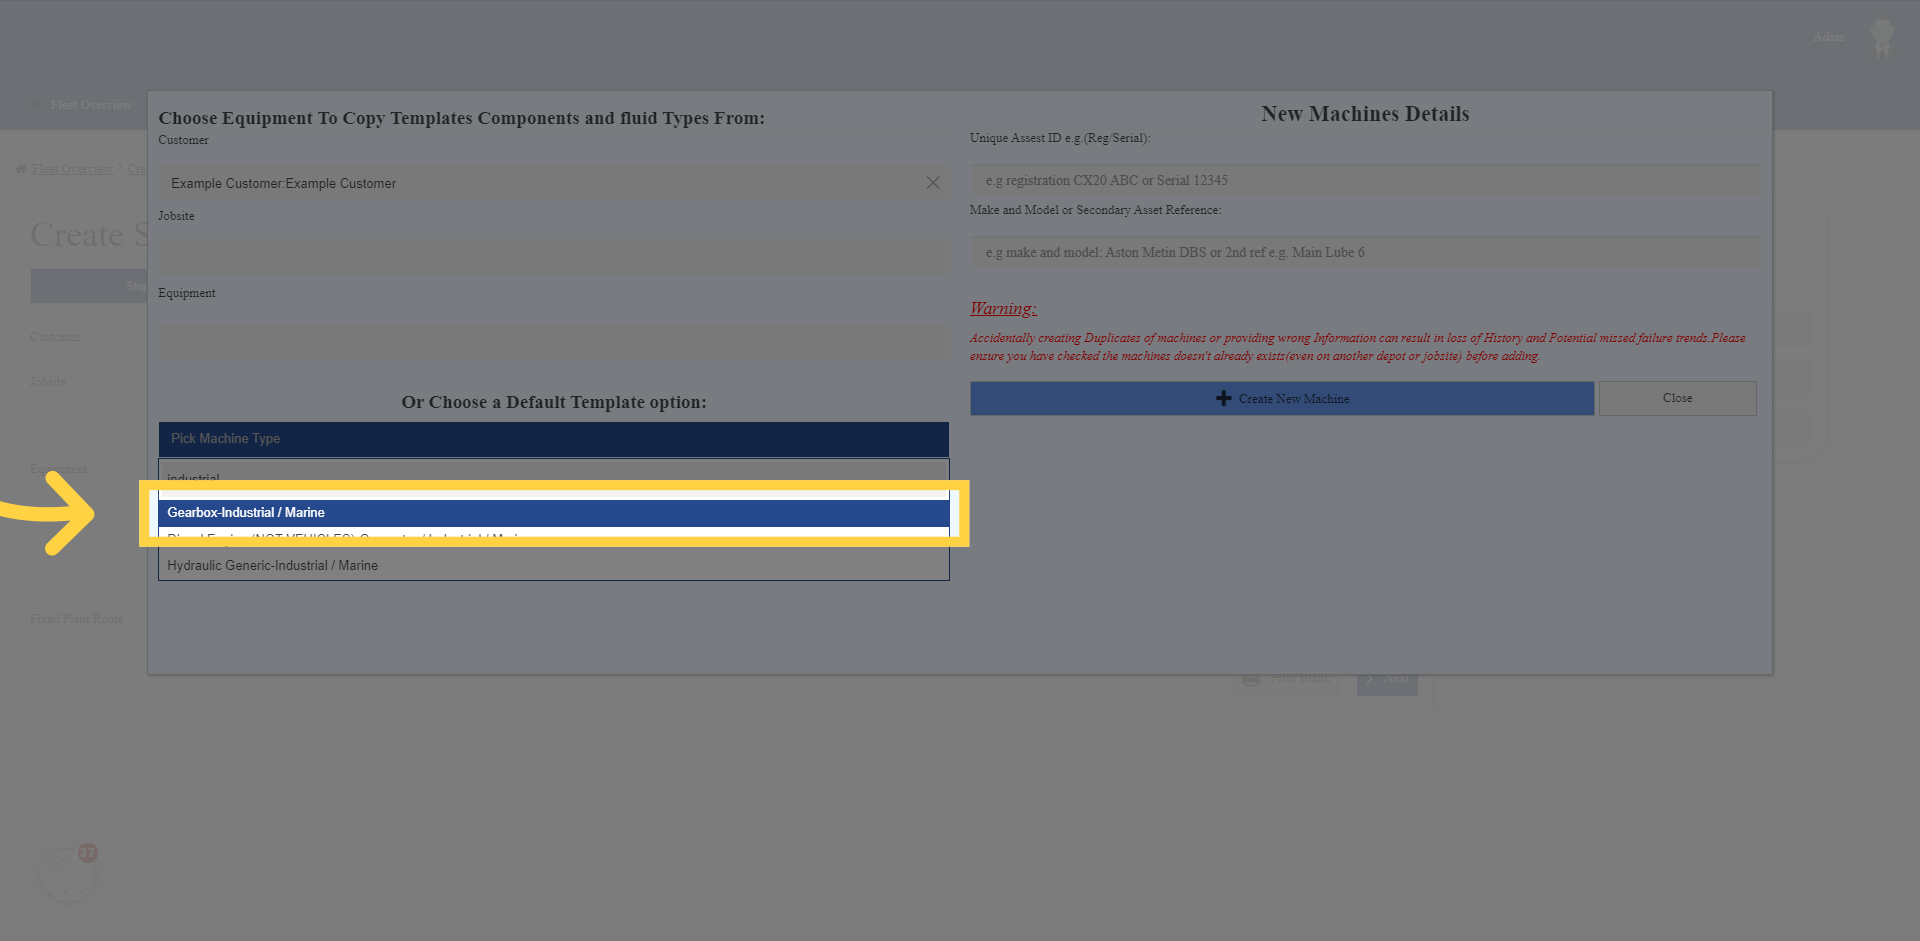
16. Pick what you need
Pick what suits your needs. For me, i’m creating an industrial gearbox for a factory customer who said “can you make me a step by step video and printable guide on how to add new machines”, so I am using the “Gearbox-Industrial / Marine” option.
17. Click “e.g registration CX20 ABC or Serial 12345” under unique Asset
Fill in a unique reference e.g. a registration of CX20 ABC or a machine Serial of 1 2 3 4 5. You can pick what you want, but it needs to be unique. So things like Engine 1, compressor 1, hydraulic 2 are not unique as somebody else could have the same name for their machine. If you like these types of references, we recommend using both, something unique like the Eng 1 serial 1 2 3 so you get the ease of not having to remember serials, but its unique and if somebody else comes to pre-register the sample later, or you need to use a report as information for your OEM, there is no confusion.

18. Fill Unique asset ref e.g. serial number
For my example I will use New Gearbox Serial 1 2 3 4 4 because I already used 1 2 3 4 5 filming another tutorial video

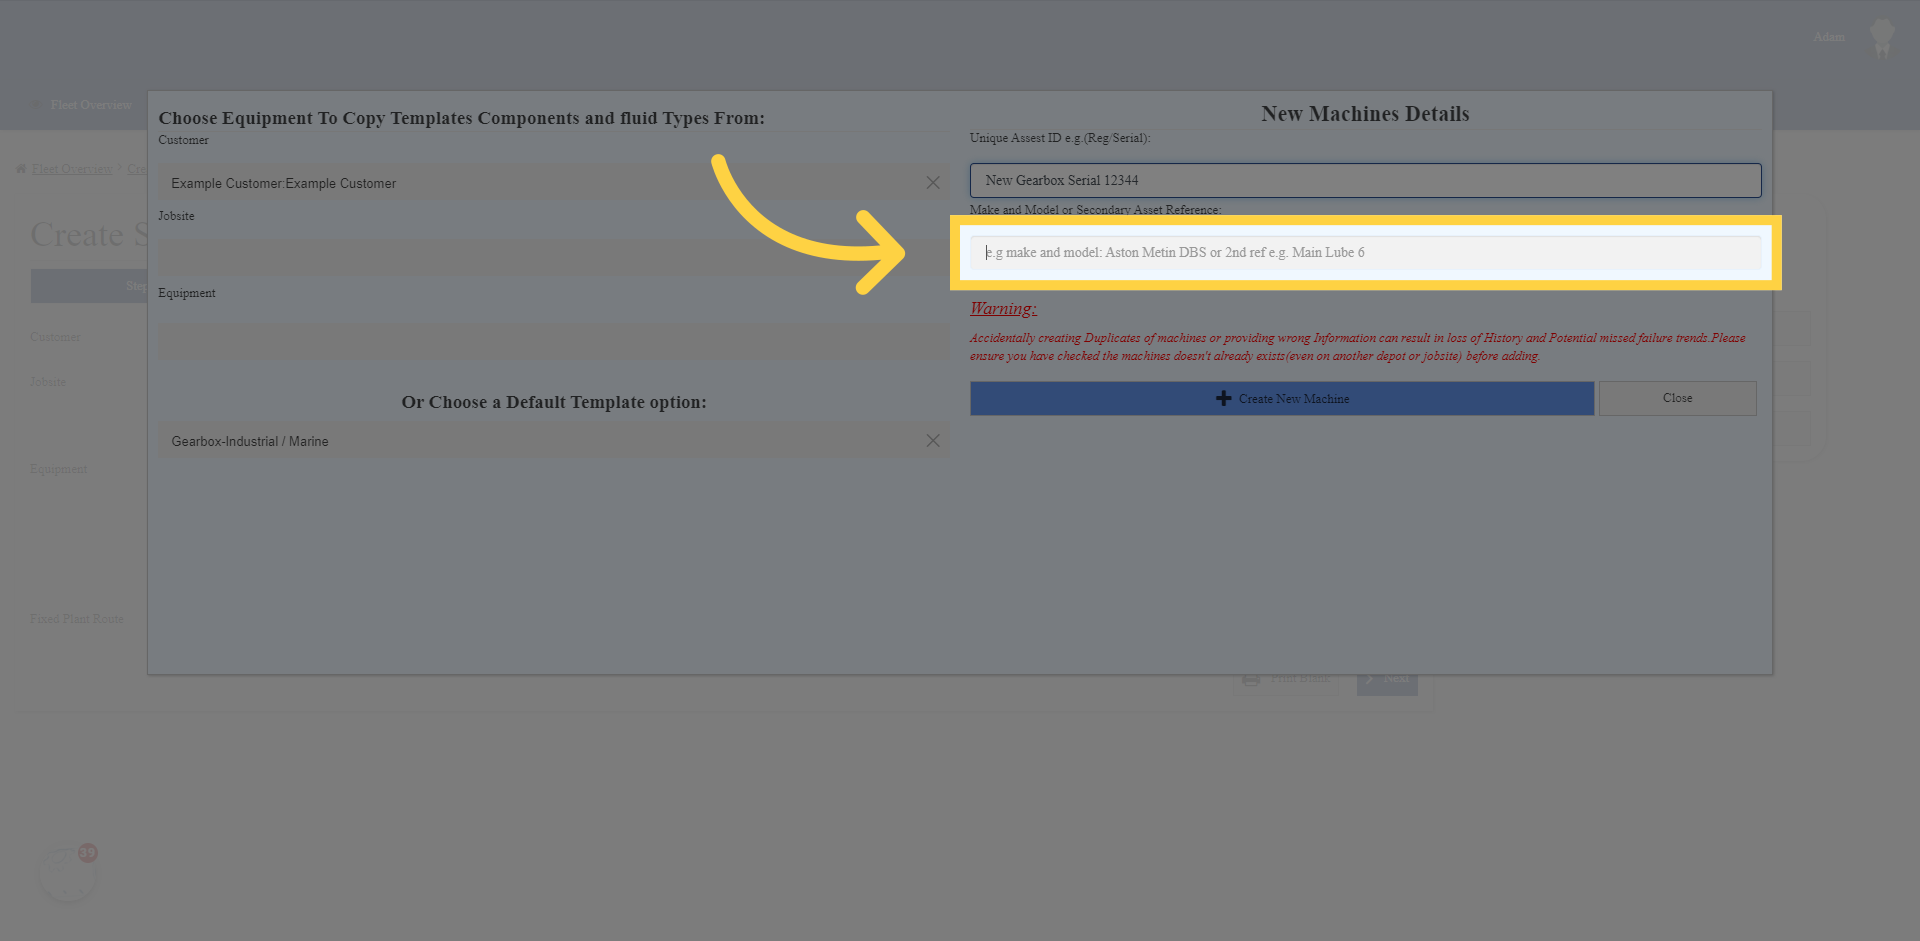
19. Fill make and model
This next option is for a make and model, these naturally don’t need to be unique and you can put anything you want here. If you know the make and model, use ithem, if you just know only the make, then use just that. If the make and model are not relevant to you, or you want another identifier such as a production line this gearbox is on, for example bottle capper line 3 then use that. The world is your oyster as far as this field is concerned.
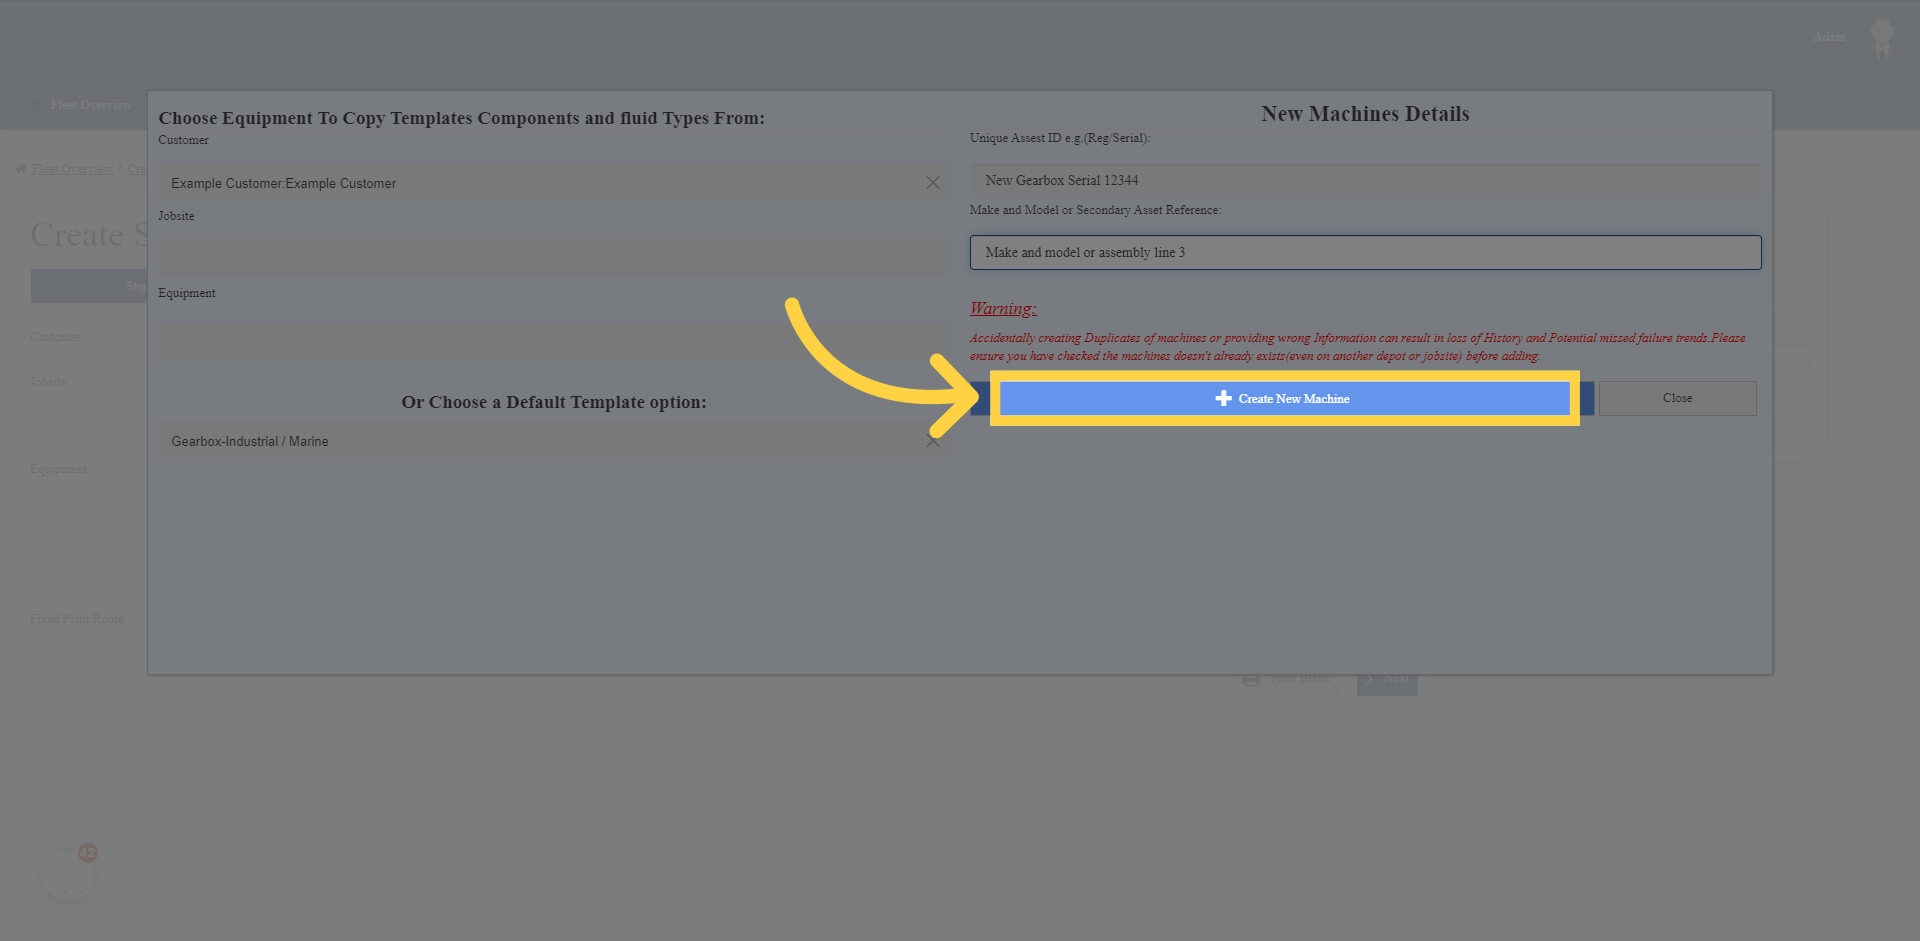
20. Click “Create New Machine”
Double check everything reads right and no spelling mistakes, no, I mean it, really check your spelling and autocorrect on your computer. You don’t want a report for your new Terex machine coming through on the report as a sample from your new T-Rex, or your John Deere Tractor coming out as a start of a love letter with John Dear. Once you have checked your spelling fully, click the “Create New Machine” button.
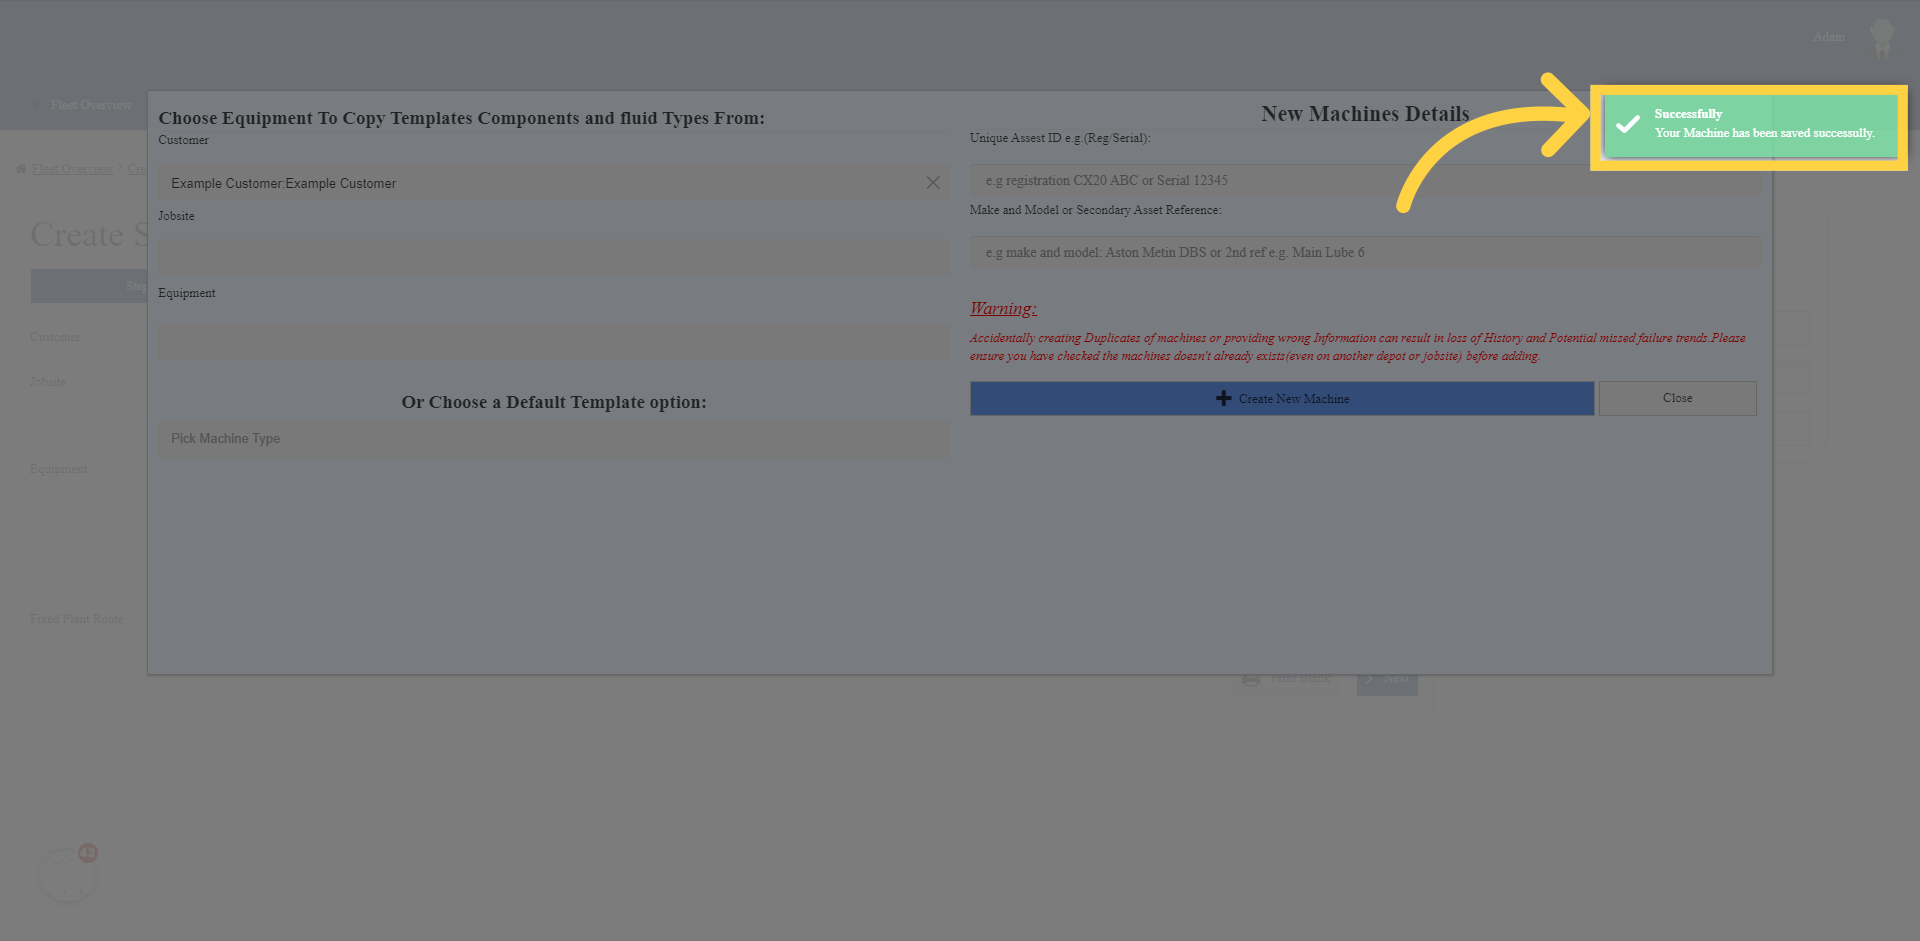
21. Success will appear
Great news the success message has appeared. That means everything was Ok.
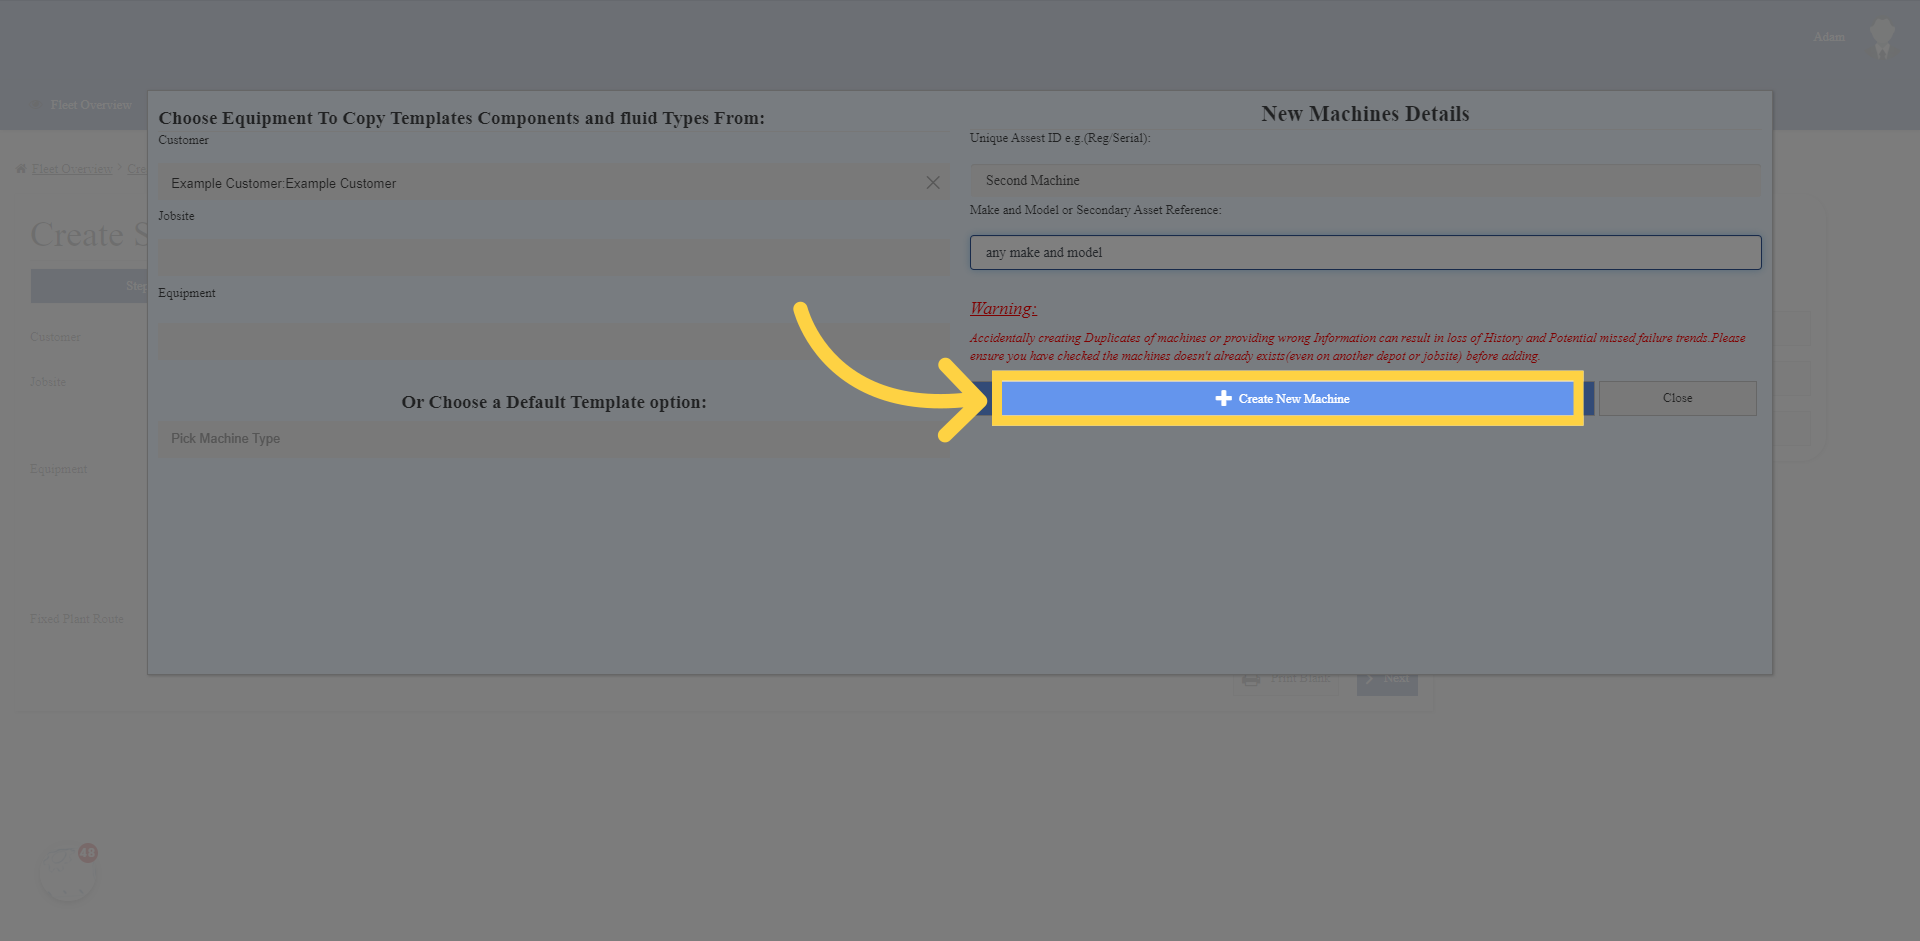
22. Add your next machine
The fields all reset for you to fill in your next machine, but feel free to use control and c to copy, and control and v to paste, or command c and v on a mac, to copy before pressing create and paste back into the box for the next sample if the details are very similar.

23. and click create again for the second machine
I have filled in Second machine as the serial and any make and model and now click create waiting for the success message.
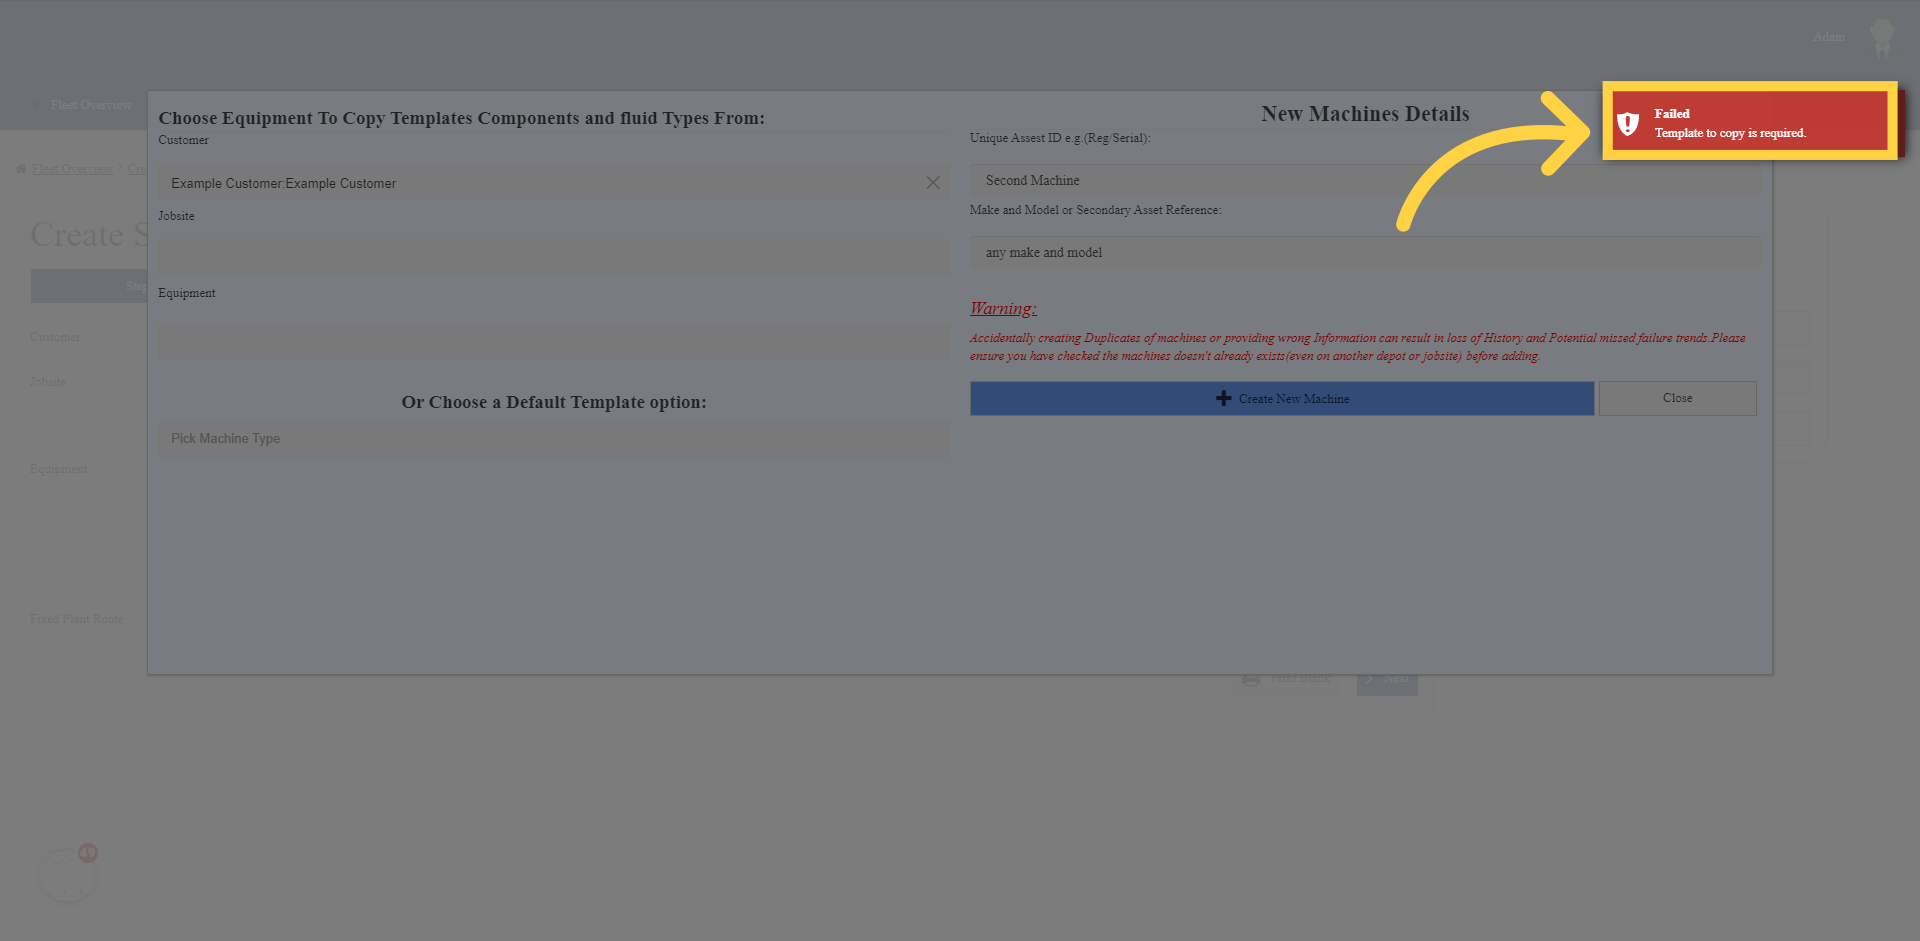
24. Oh No we missed something….
Oh no, what’s happened here? It says the template is missing, we forgot to pick the template before pressing create. That’s what happens when you rush these tutorial videos.
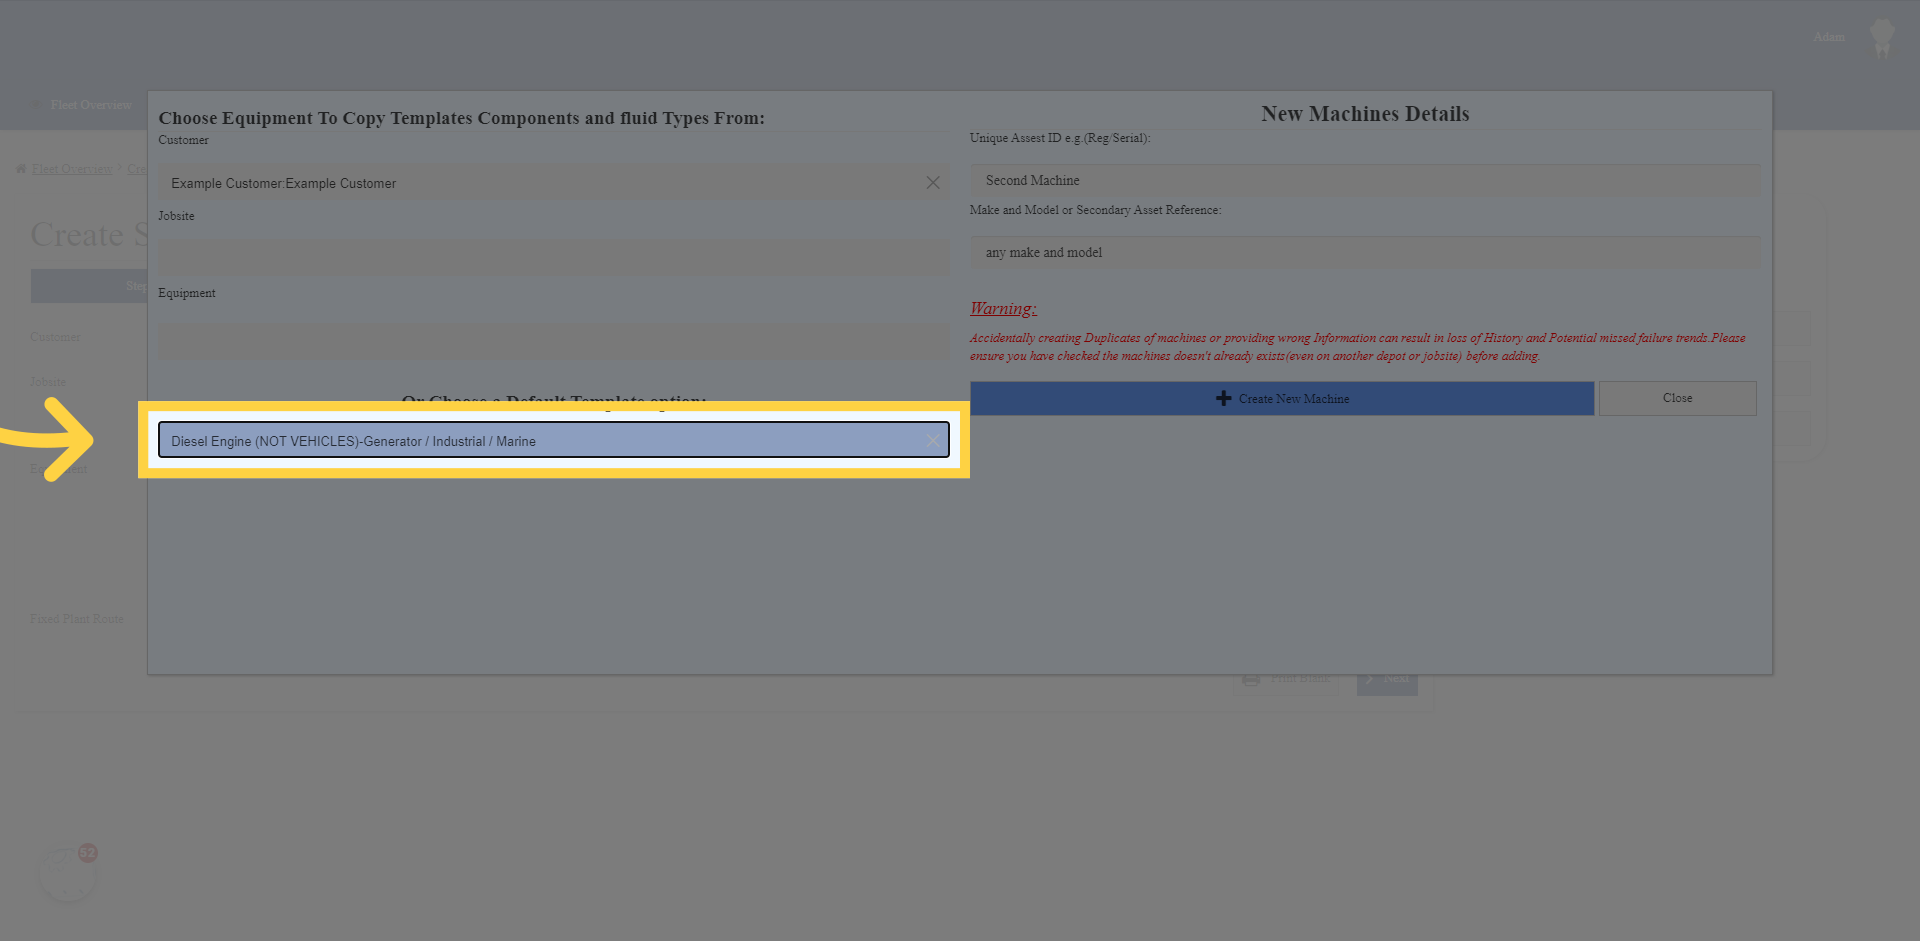
25. Pick next machine
Easily solved, i will just pick the missing field. It will be either the template, serial or make and model, sometimes make and model will show as missing the unit number to extra keep you on your toes and confuse you. Lets pick that now, and off camera it came up with a the green success message. So that’s good news.
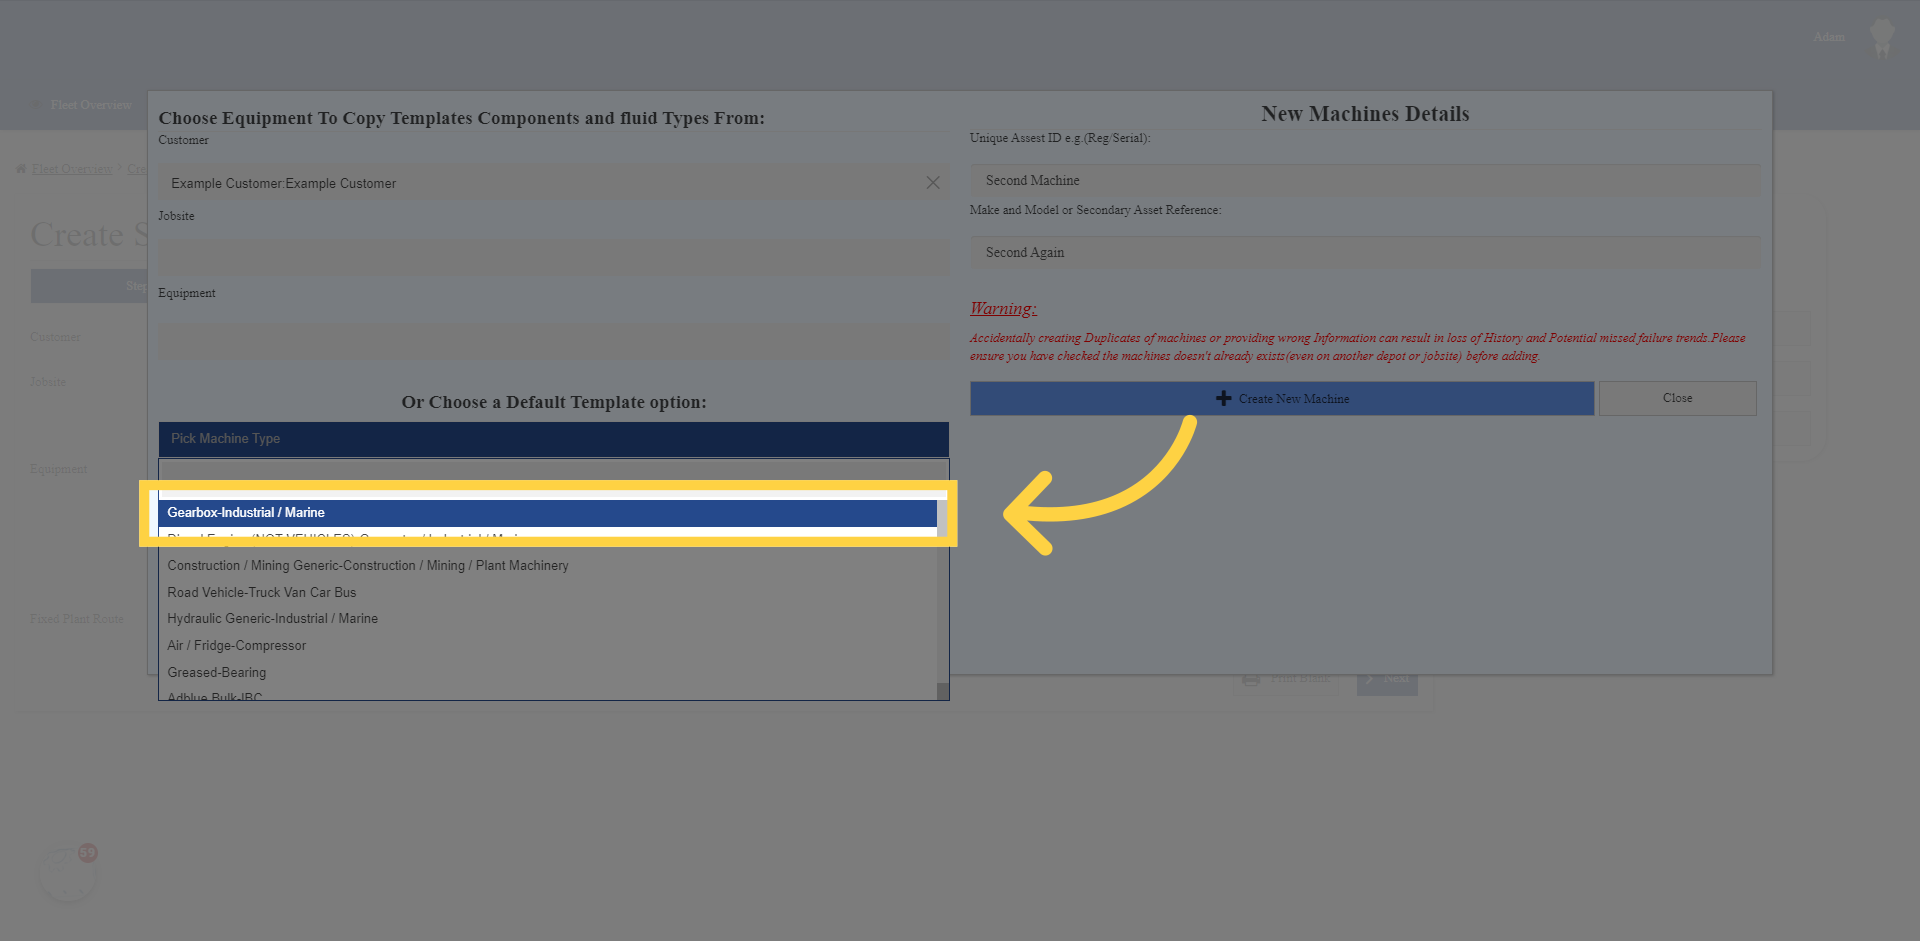
26. I have made sure to pick the template this time
Click the “Gearbox-Industrial / Marine” option.
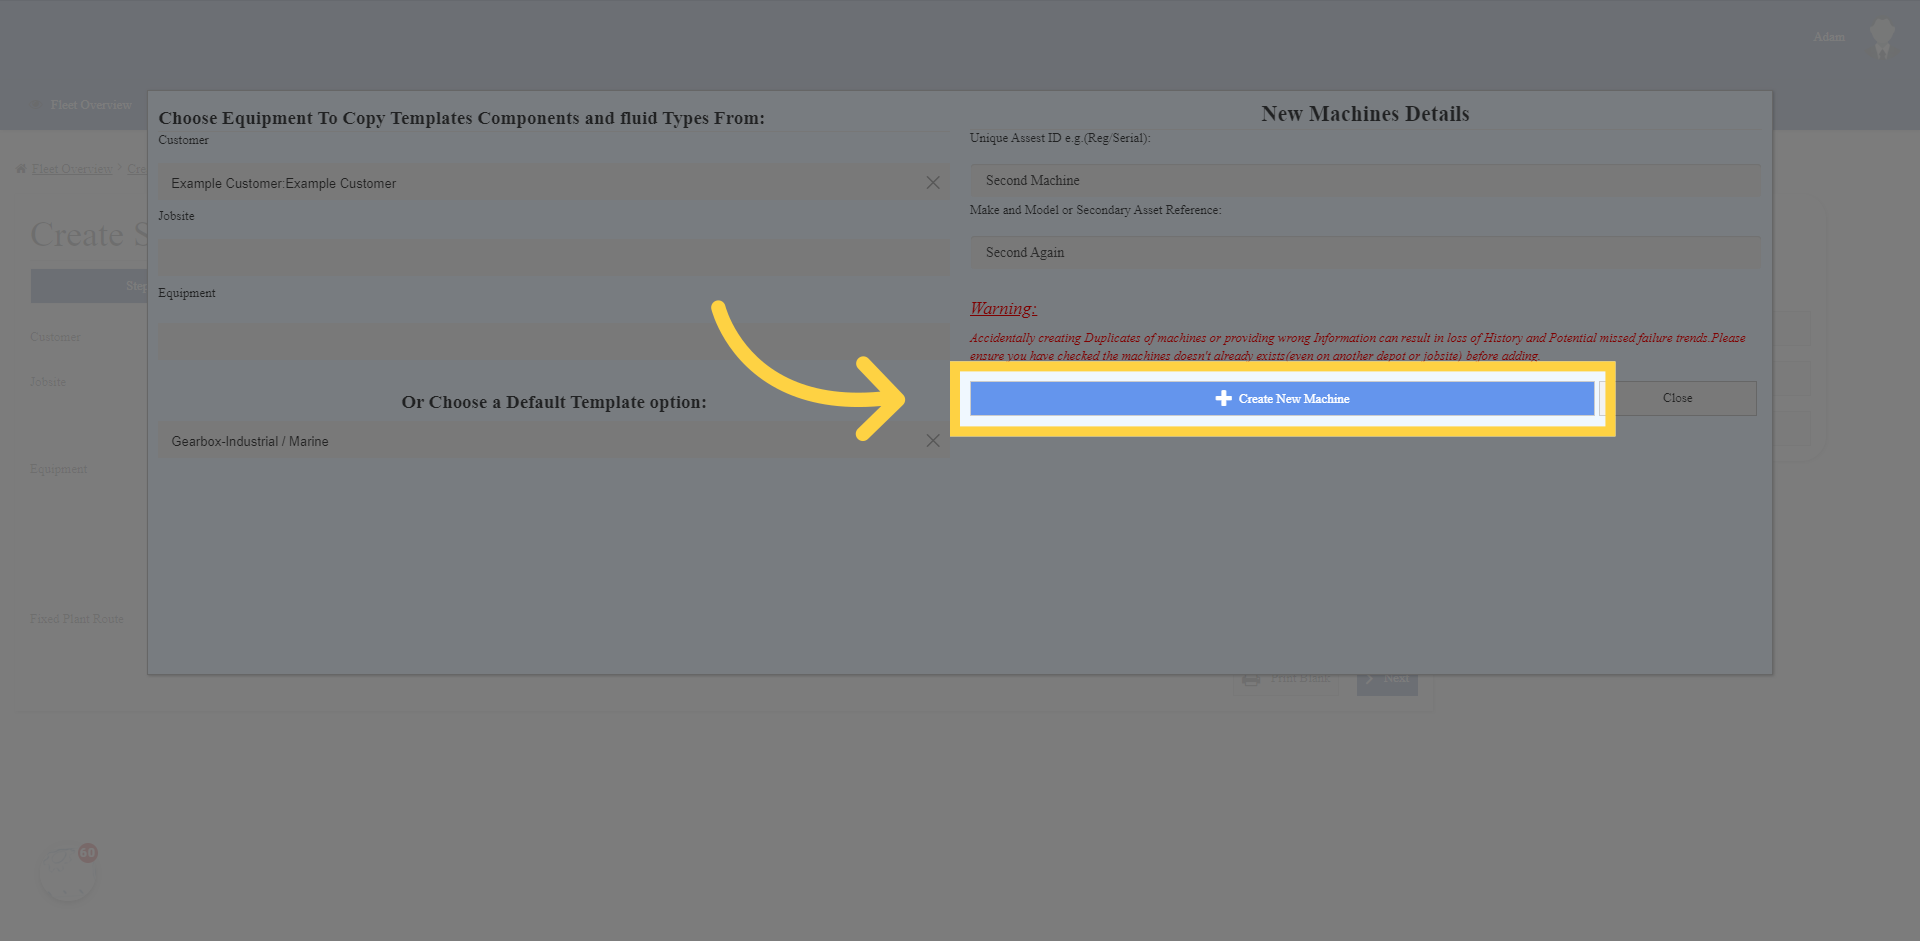
27. Create any further machines
I am going to create my third and final machine making sure I fill in all the boxes. I Enter “Second Machine” in the serial and click create new machine. For those playing close attention, you can probably guess what is going to happen.
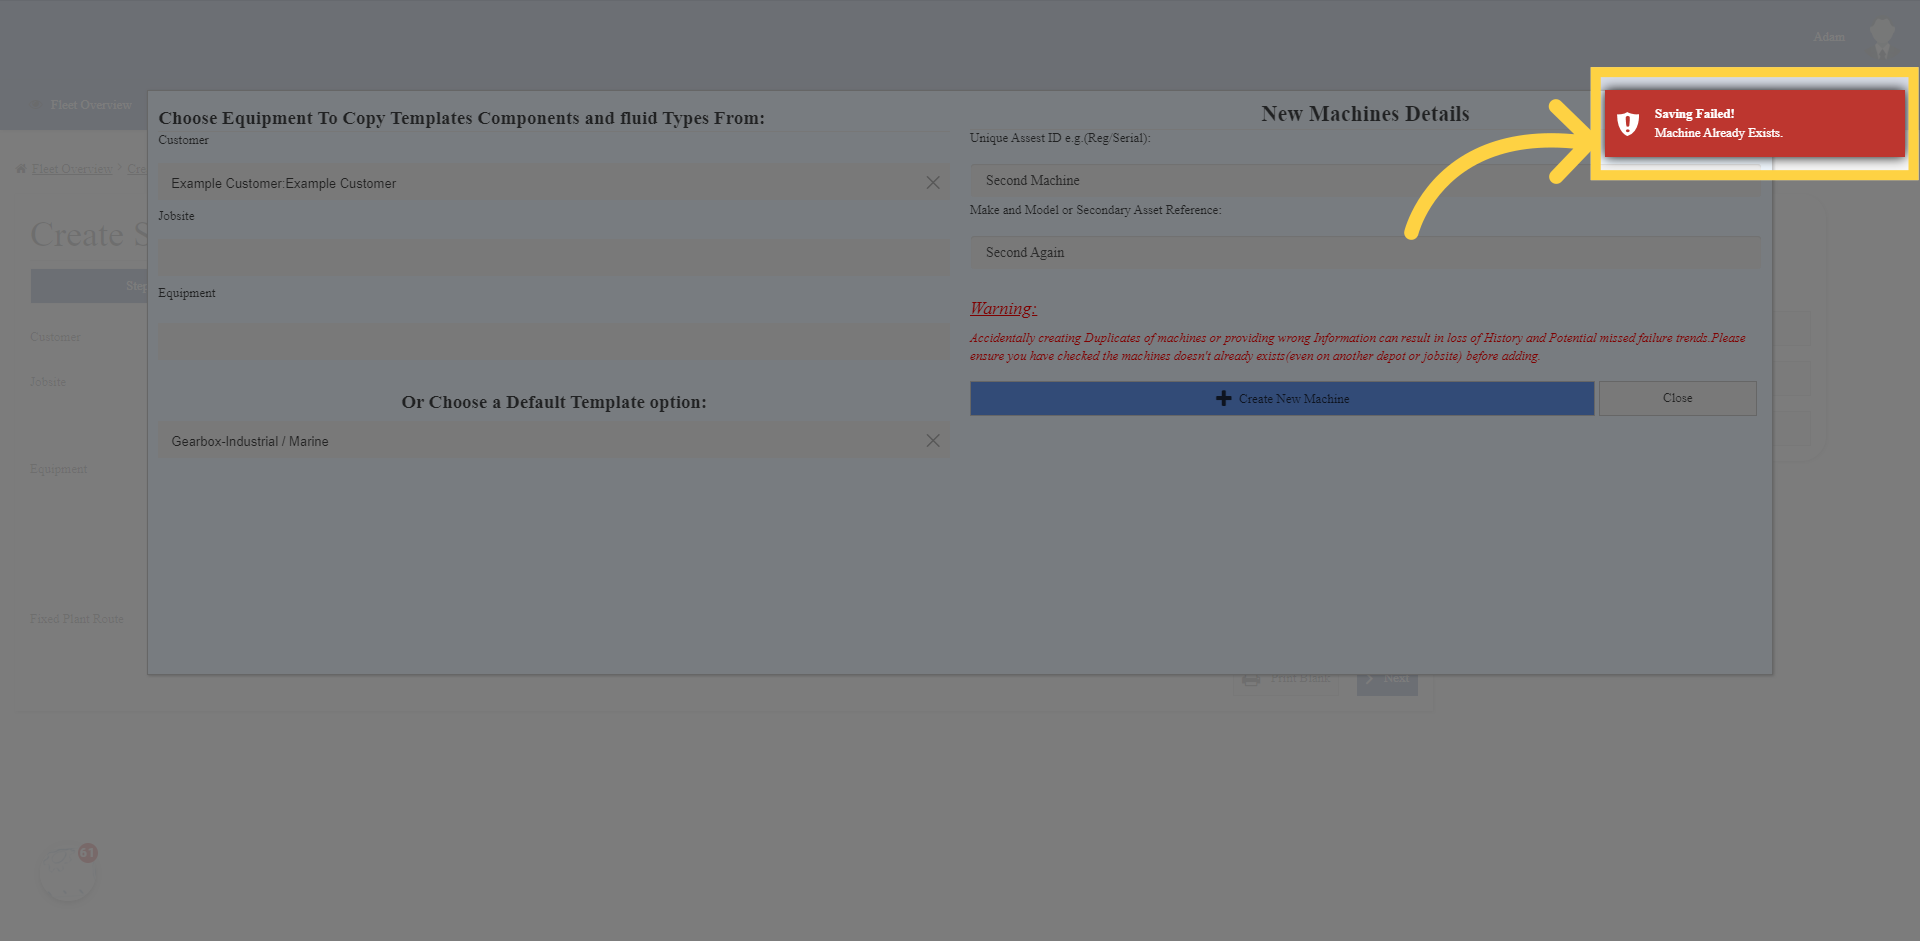
28. Oh no Machine already exists
Yes that’s right, the machine already exists. Those paying attention notice i typed in the third machine I was creating, the exact same serial as the second machine, so it came up to warn me and stop me creating a duplicate. That’s why its important to pick something unique. Sometimes, you will go back and see its not on your current job site it needs to be, in which case you need to move the machine between jobsites, but that’s another tutorial video.
29. Correct to something unique if this is the case
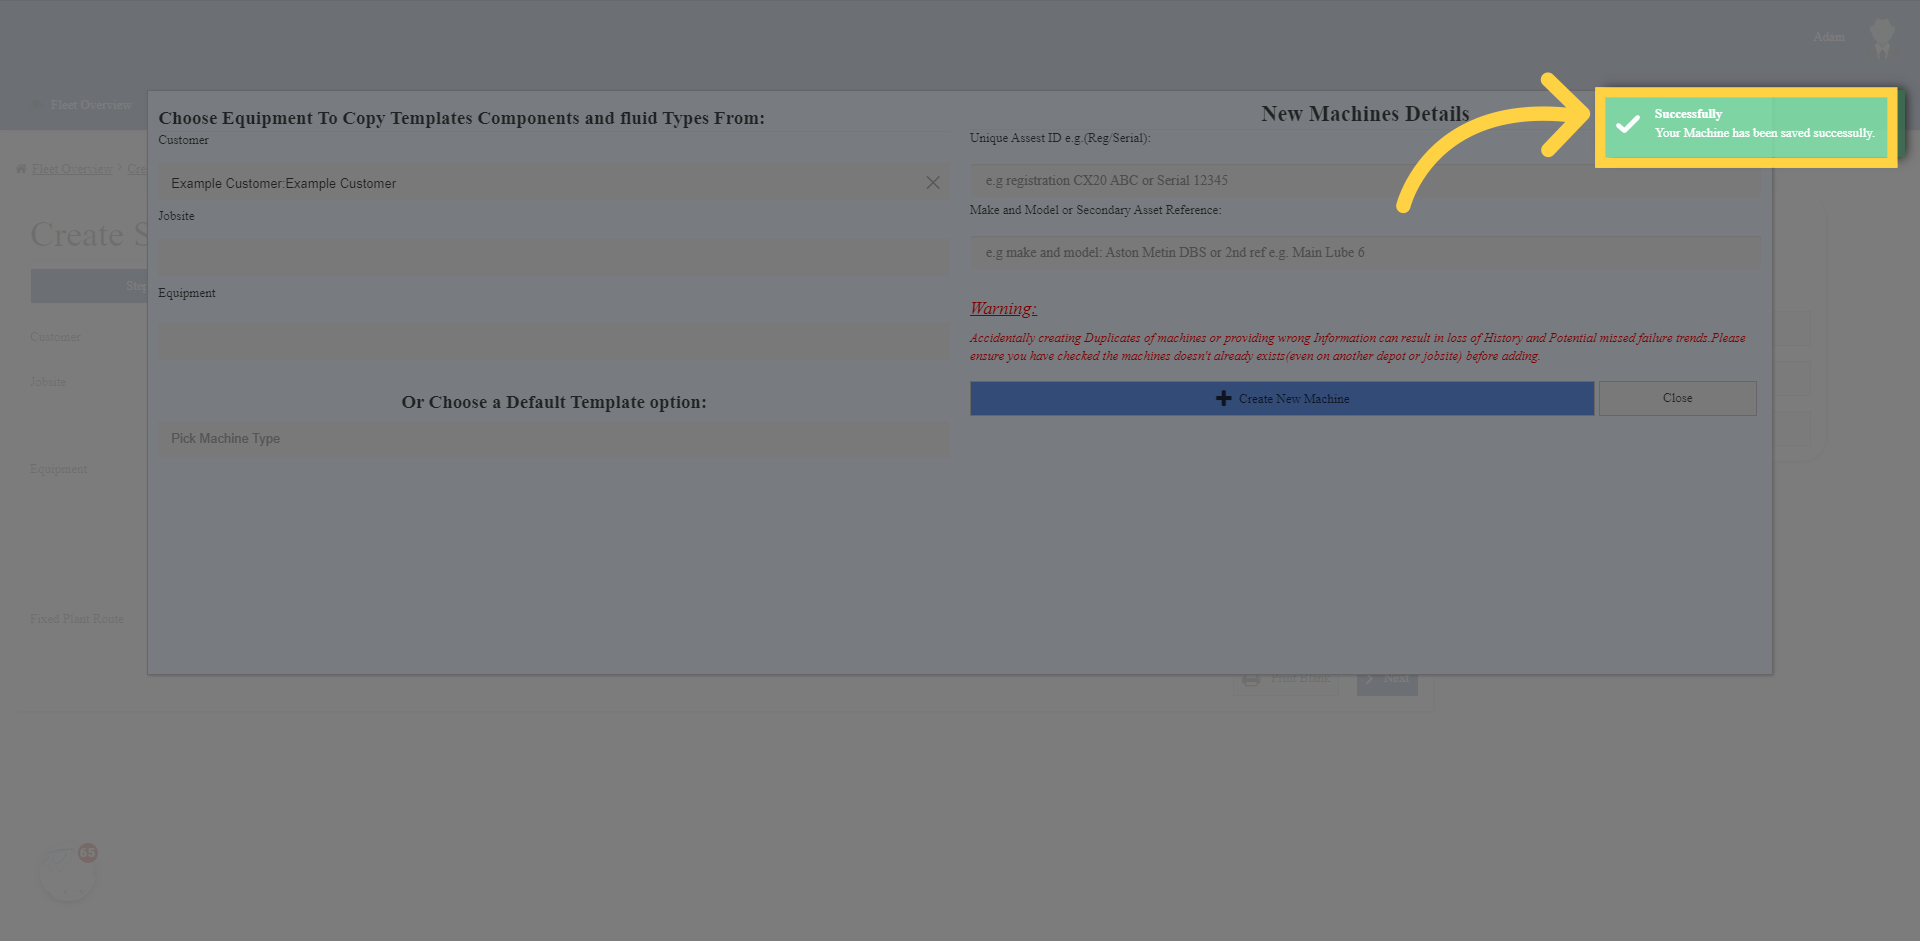
I am going to be lazy and just call this second machine 2 and by adding a 2 at the end its now unique, to show you it now works.

30. Woohoo!
And look it did. This time i remembered to take the screenshot of the success message.
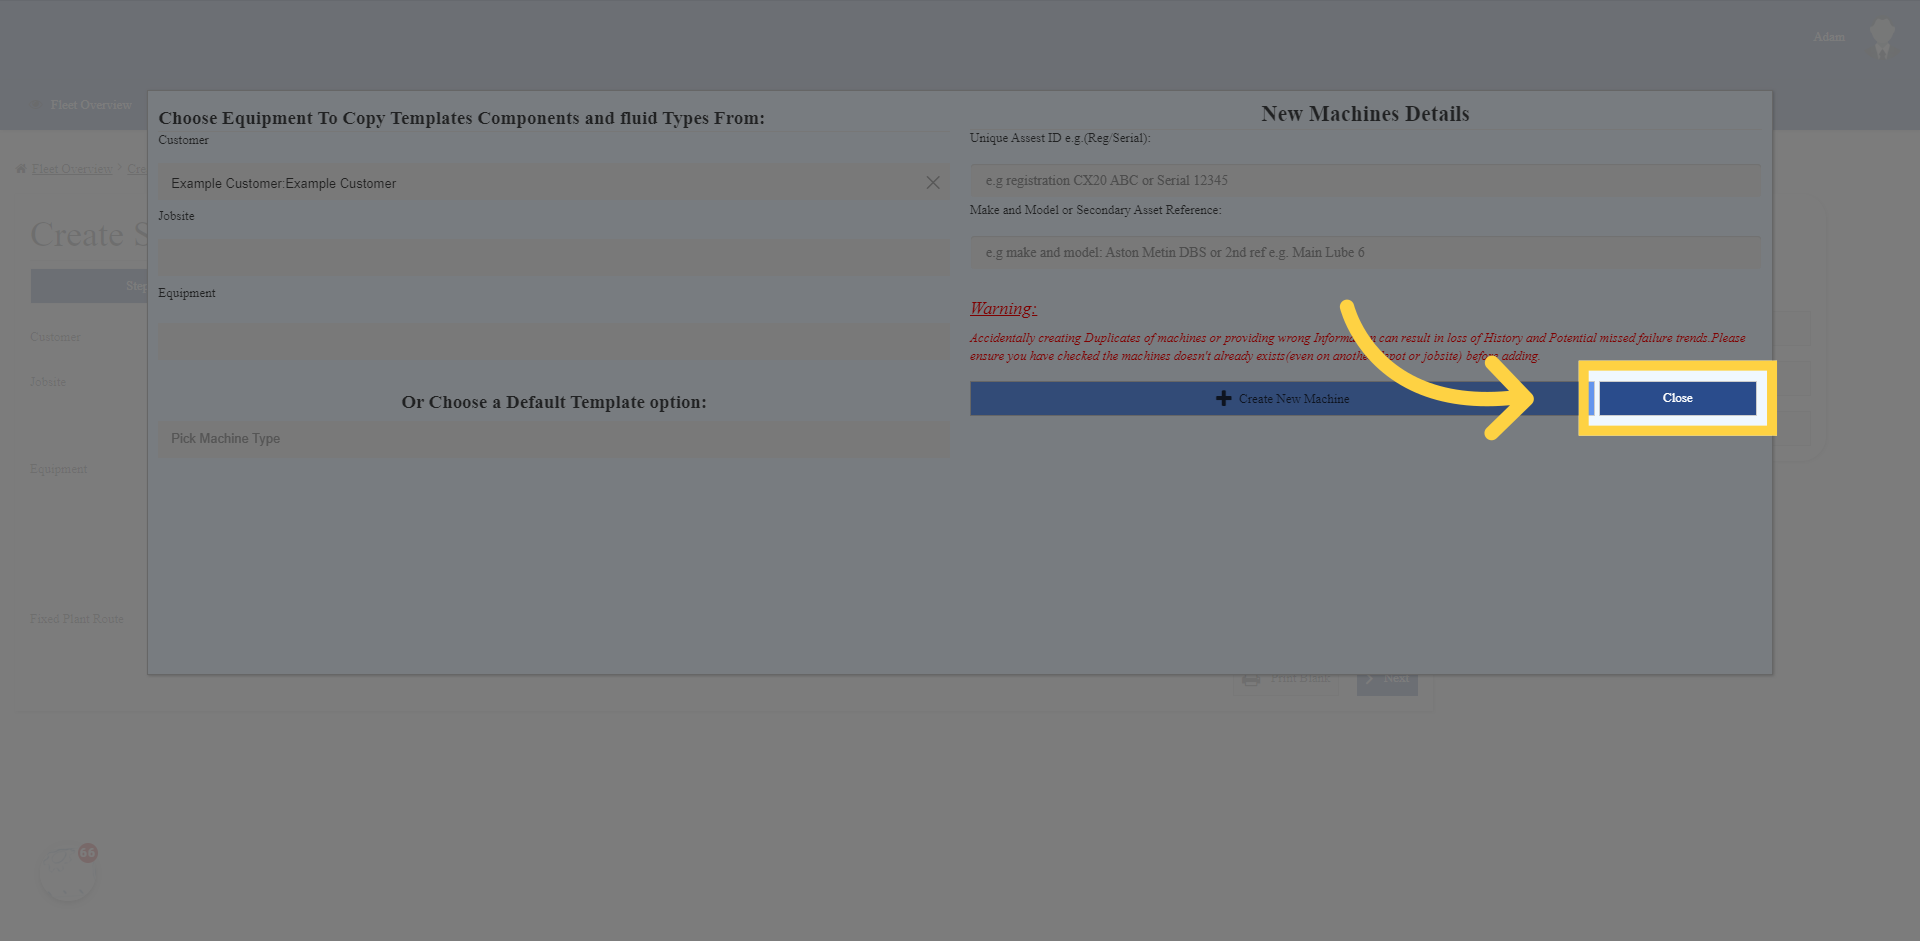
31. Click “Close”
Now I have finished adding the machines I need, and my little lecture on the importance of filling everything in properly, you can Click the “Close” button. By close, i mean the word close, not the whole browser. You will be surprised how many people tell me they now see their desktop of their computer at this point because they clicked the cross in the top of the browser. You need to click the word close, not the big cross in top of your browser window.
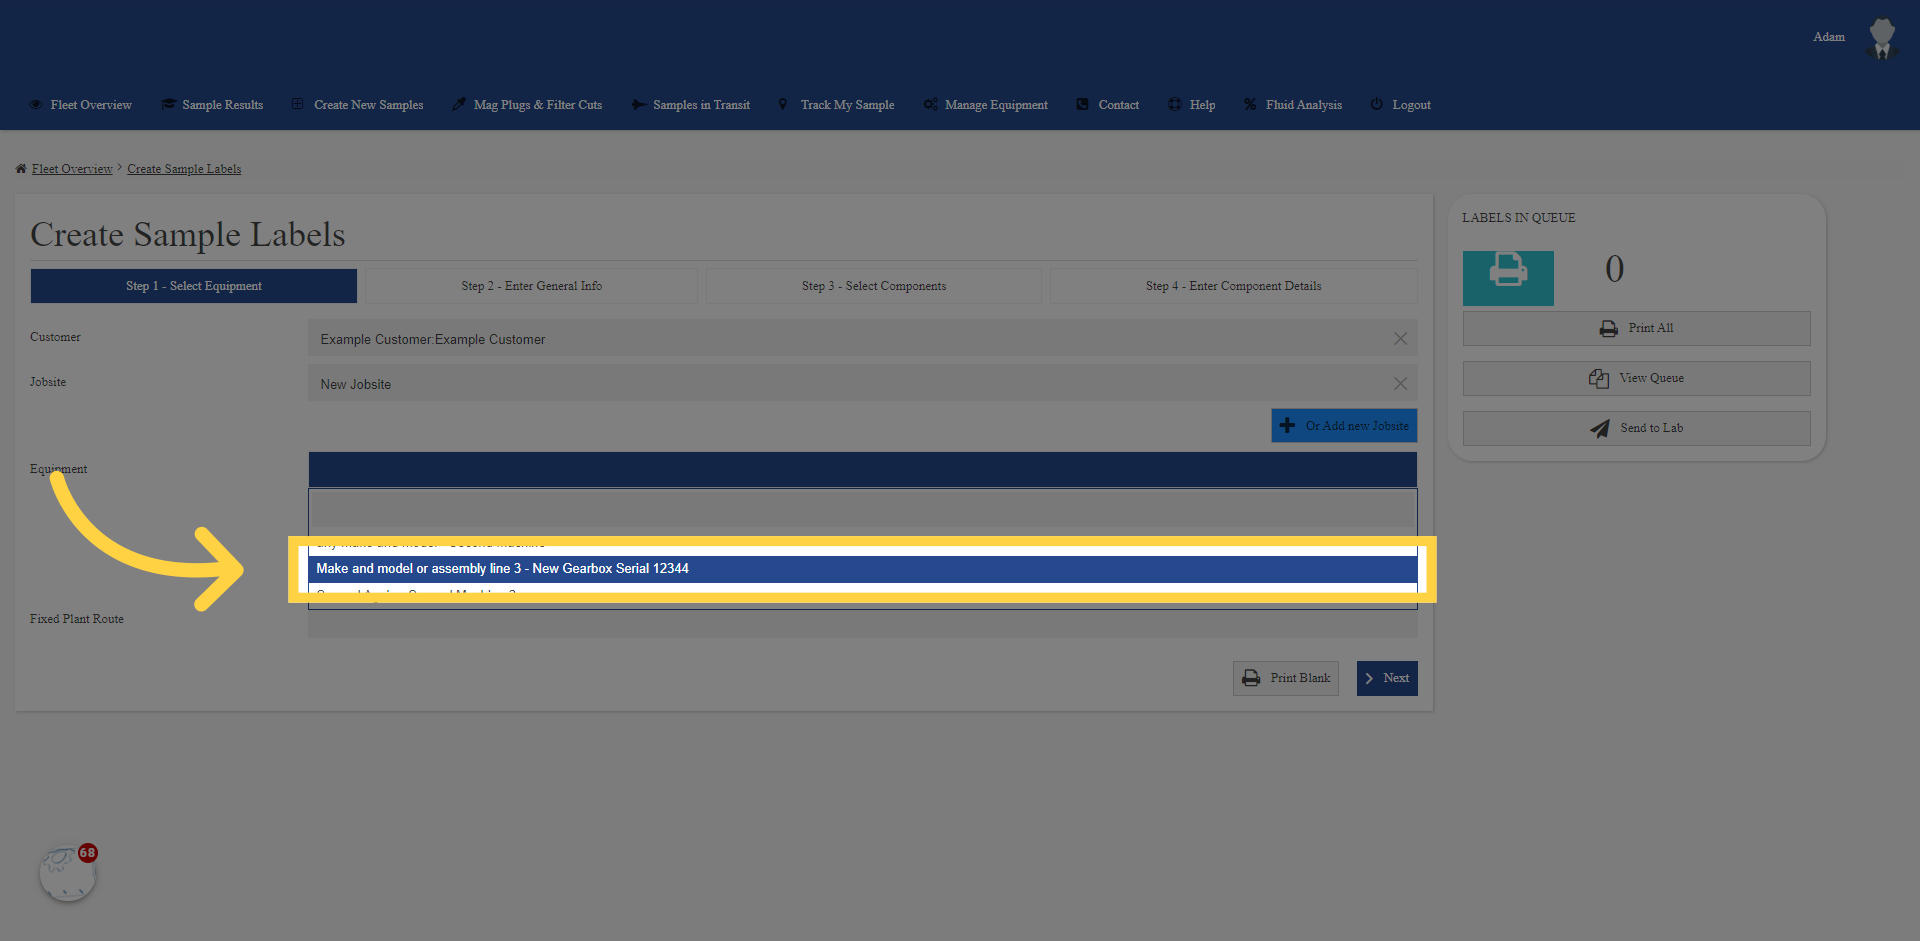
32. Click your machine in the dropdown to use in future
I now have my new machine list and they are in the third dropdown. There are only three machines, so it is easy to find, but remember to start typing if you have many machines to narrow down the list.
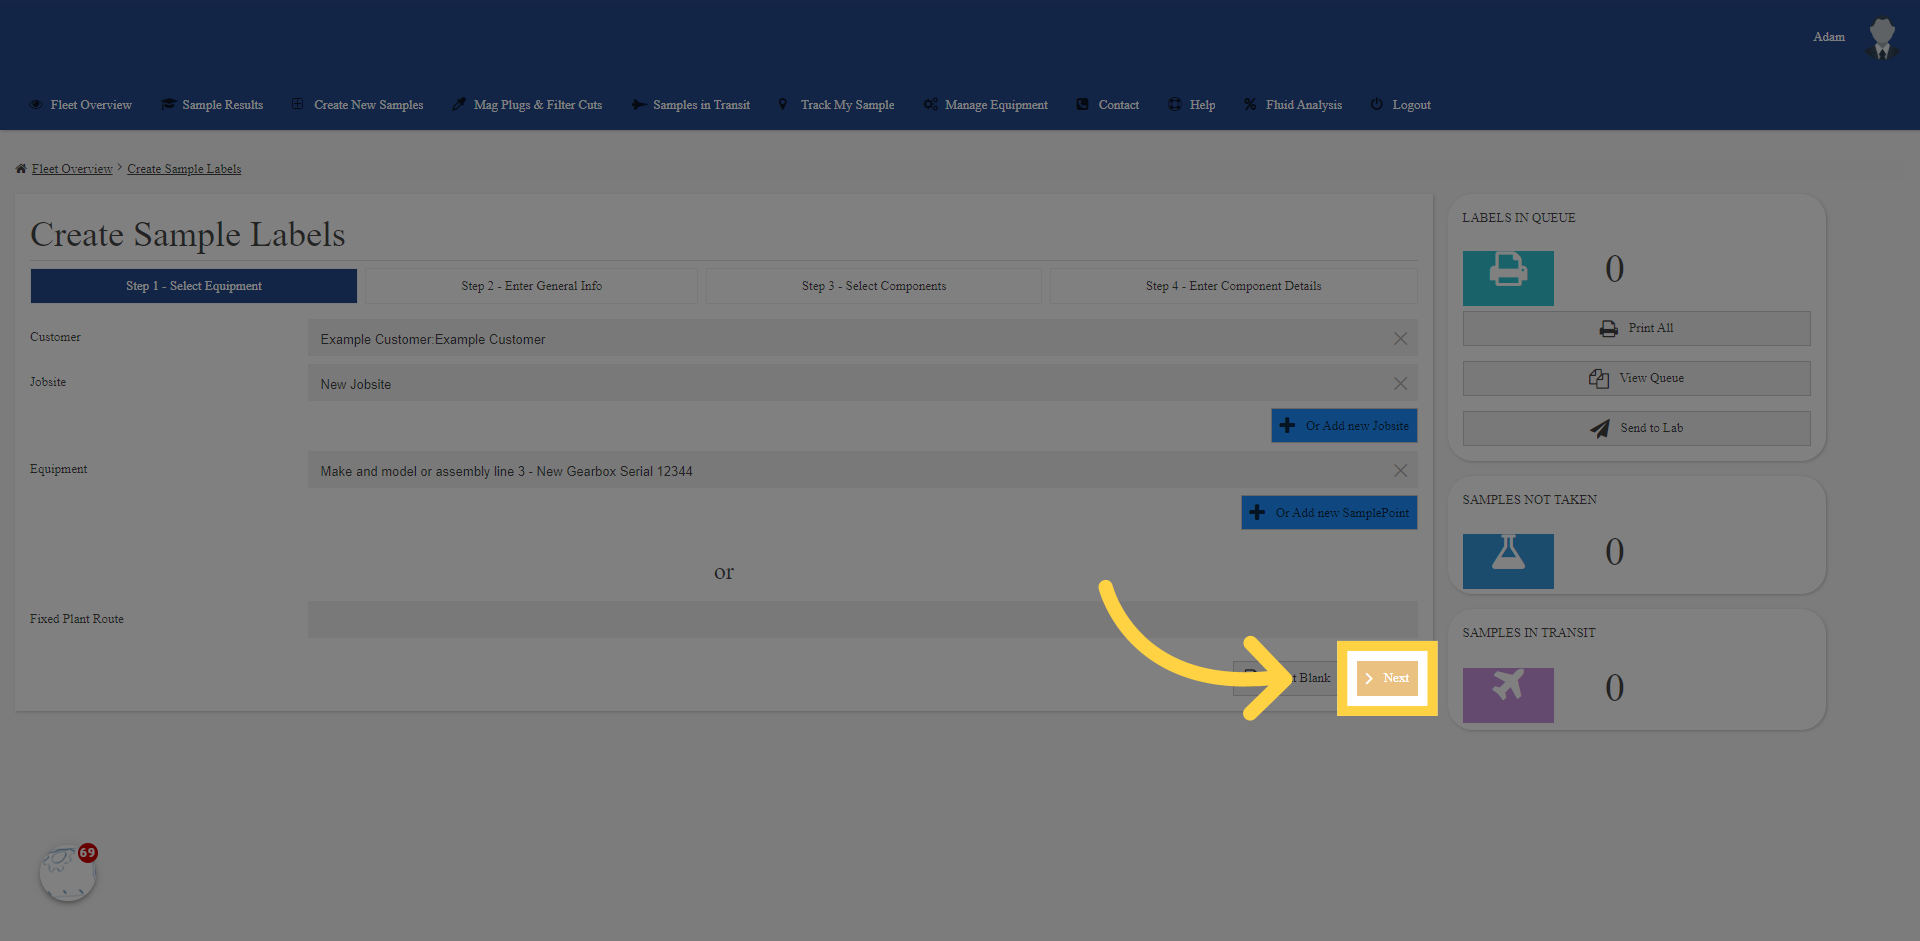
33. To pre-reg it, Click “Next”
Well done. You can now have a coffee and a break before you have a nervous breakdown from all this new information you have learnt on creating new machines. For those of you feeling brave you can click the “Next” button to pre-register one of these samples now too.
This guide covered the steps needed to create new machines on LubeWear.com. By following the instructions provided, you can easily add new machines and manage them in the system. We hope you feel confident enough to have a go. If you have more than 100 machines to create in one go, then reach out to the lab as if you can provide them in Excel or csv format we can do a database import for you. Please note the import is only for large numbers of machines as it takes a couple hours of lab time to perform database imports, so for small numbers of machines its much easier to create them yourself.